For many teams it is essential to work with different branches at same time so the main repository stays stable while development can still progress at a fast rate. Developers can create their own branches from the trunk/baseline and work independently on it. (Read more about that on Martin Fowler’s blog)
This creates a few problems when it comes to testing:
- With the changes that occur in branch, some test cases are affected too and needs to be changed.
- Multiple branches means maintaining multiple copies of a test case.
- Testing individual branches requires a tester to refer to the updated list of test cases only.
- Some branches will be merged to trunk/master sooner than later, that means at some point you will be merging these updated test cases to the trunk/master.
In this article we’ll describe how to solve these problems step-by-step.
Maintaining multiple copies and changes of test cases
To get started, you should have all your test cases in the trunk created in Test Collab as shown below. We’ll take a sample project as example here to make things clear.
The following image shows a typical suite dashboard page where existing suites and test cases are being displayed in a tree structure in the left section and details of the selected test case is shown in right section. Along with this information, there are few buttons getting displayed, which when clicked, starts the related operation/functionality like “Add new suite”, “Add new test case” and so on.

Then create a new suite named ‘Branches’ where you’ll store different branches your team is working on. This new suite “Branches” should not have any suite as parent. Now create child suites of this suite one-by-one which represents different branches.
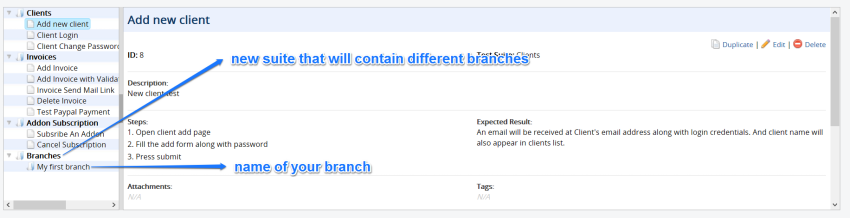
A branch will affect several test cases as it is actively developed. Say, our branch ‘My first branch’ affects all test cases in ‘Clients’ suite in different ways.
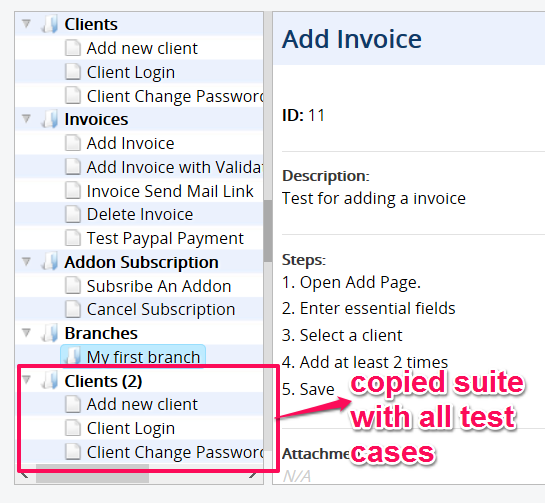
To manage this, you can simply copy whole test suite ‘Clients’ under ‘My first branch’. To do this, right click on the suite ‘Clients’ and a popup menu will appear. Select ‘Copy’ menu option from that popup menu. Depending on the numbers of test cases, it will take time to complete the requested operation and after that the suites/test cases list will be refreshed. Now the copied suite, in this case ‘Clients (2)’, will appear at the same level where the original suite ‘Clients’ reside and will have a copy of all the test cases which exists in the original suite.

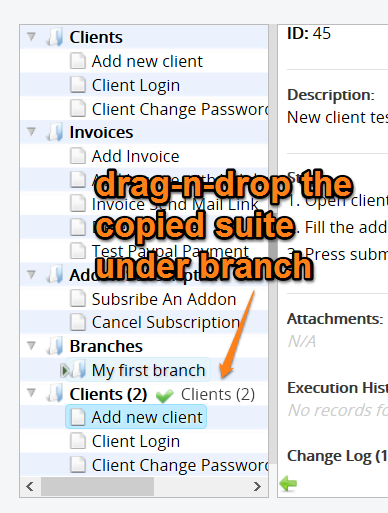
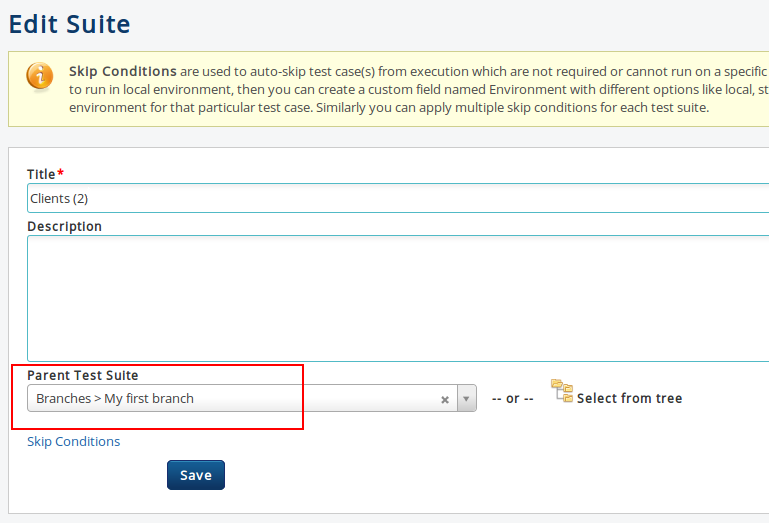
Now, next thing which have to be done is to move the new copied suite under that suite which represents our branch i.e. ‘My First Branch’. To do this, we can simply drag-n-drop that suite ‘Clients (2)’ under the suite named ‘My First Branch’ or by editing that suite ‘Clients (2)’ and changing/selecting its parent suite as ‘My First Branch’ and save.
Now you have a while copied suite ‘Clients’ under ‘My first branch’. This can be done for individual test cases as well. This can be done either by clicking ‘Duplicate’ action link available on test case view or by ‘copy’ test case popup menu option which appears on right click on that test case.
Also you can create more than one branches and have multiple copies of test cases and suites related to the branches respectively.
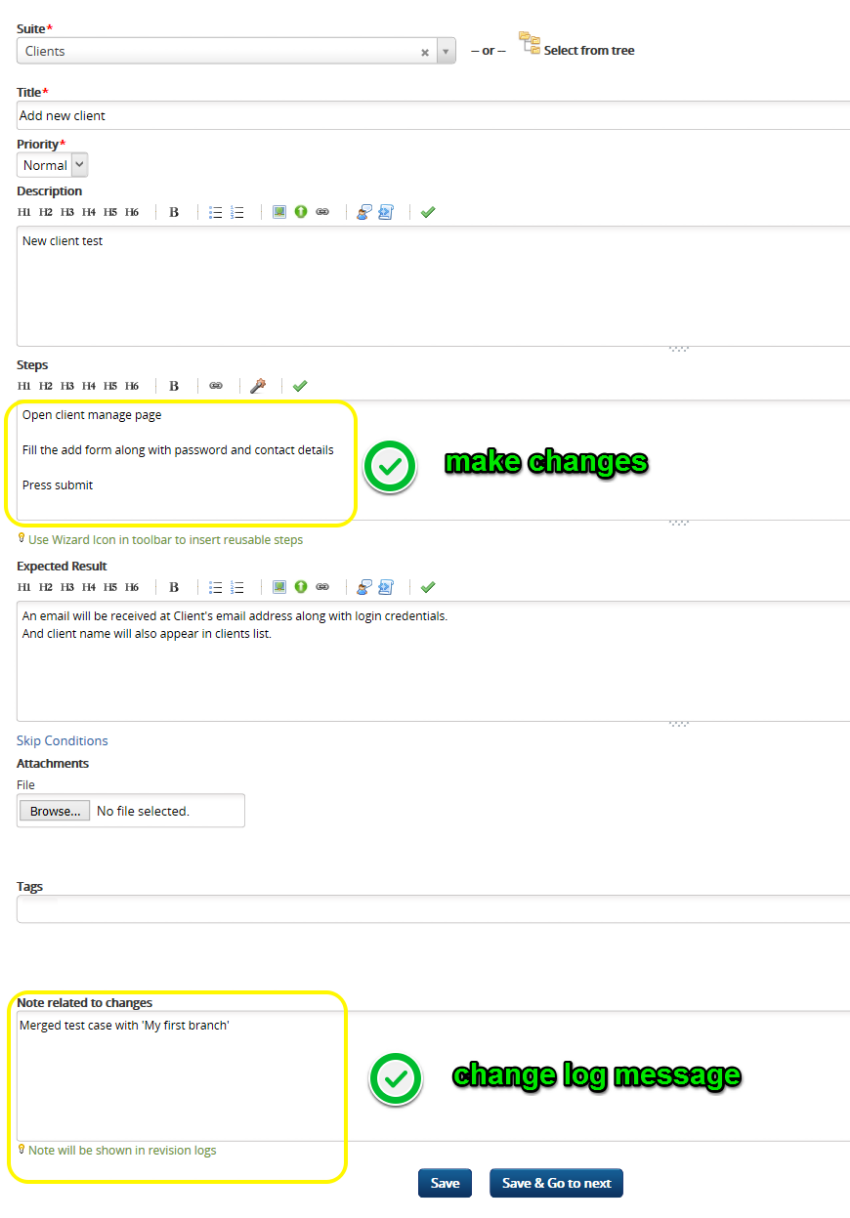
After this is done, you can now proceed to make changes in your test cases independently in different branches. A change in test case or addition of a test case will live only under that branch and is completely independent of baseline or other branches. While changing a test case, also mention reason or comment in field ‘Note related to changes’ for later reference.
Testing Individual Branches
After you are done with managing the structure and copies of test cases in different branches, you’ll eventually need to execute these.
You’ll need to:
a) test trunk/master,
b) test individual branches
Testing trunk is simple: As there will be existing executions for suites and test cases in trunk/master and those can be re-executed either by a tester or by automated testing tool (using test automation feature in Test Collab). Using test automation feature will also increase testing speed.
For branches, we need to create new executions and to easily recognize which execution belongs to which branch, also add branch name in execution title while creating an execution. For faster execution creation, execution templates can also be used. For example, template based on tags.

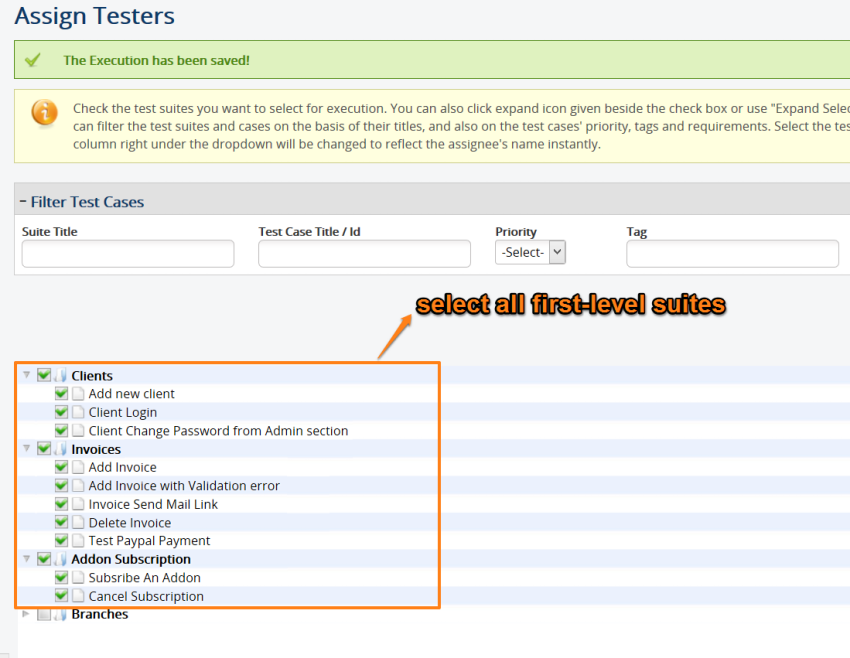
To test a different branch, you’ll need to select the suite under the branch name instead of first-level suite. In this case, ‘Clients (2)’ suite under ‘My First Branch’ suite should be selected.
After assigning test suites/cases to tester, the newly created executions are ready for test/run. The automated tests (if any) for the original test cases exists in trunk/master will not work properly for these modified/newly created test cases in branch. So, in this case, we need to run these executions manually by a tester. Rest of the test execution process will follow.
Merging the test case changes after branch is merged
After complete testing, the branch will be merged into trunk/master. This will also require to update/reflect the test case changes, done in branch, into the trunk/master. Currently there is no way of automating the merge function and this must be done manually. We recommend opening the test case in multiple windows and compare them side-by-side.
Once you figure out the changes to make. You will need to update the test case (Edit link on test case view) at the baseline as indicated below:
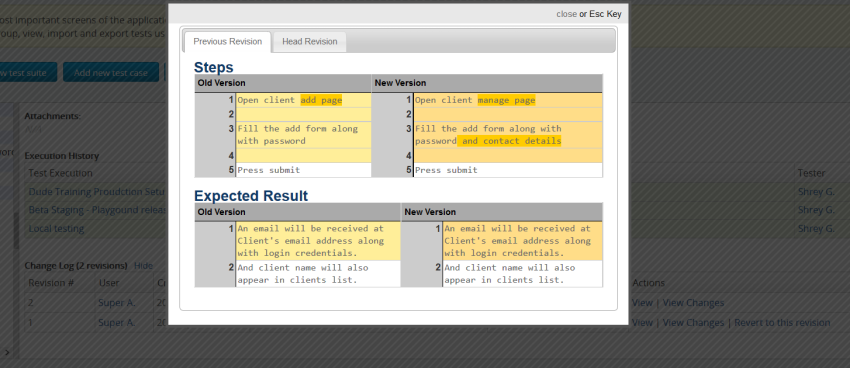
After changes are done, you can see the updated test case with change log:
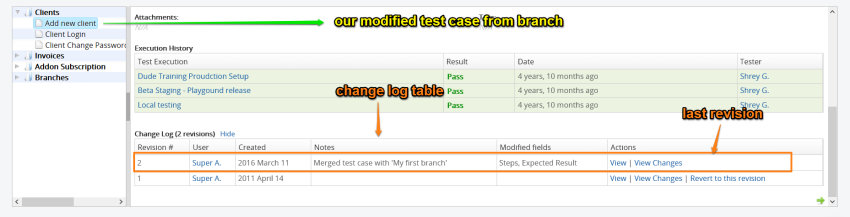
You can also run a side-by-side diff to see what was changed.