Test driven development as you may already know is a simple practice of having your dev workflow in such a manner that your tests determine the flow of development. In simple words, you’re writing tests first and then developing the actual code that passes those tests. Here are some benefits of this approach in case you’re wondering.
API-first involves developing your API first (preferably with a well-developed API framework) and any other UI or client later. There are immense benefits to this approach, since API endpoints are much easier to test. All you have to document is input and output in most cases while developing monoliths you know it’s not as simple.
Another benefit both of these strategies offers comes from separation of concerns principle, since you’re dealing with backend only – it eases up any future debugging and deployment.
If until now you’ve found yourself spending a lot of time on monoliths then you can understand how painful impractical it might be to use Test Driven development. However if you enter into API development, things change and wonderful things start to happen when you chose TDD.
With tools like Postman, it gets even easier to do so which we’ll explore shortly.
What we'll cover
We'll be combining Test Driven development principles with API-first strategy and focus on a workflow which would be much faster than traditional monolith-style development.
We’ll also look at implementing collaboration within team (scm), so everyone in a team can contribute.
About Postman & Newman
Postman is a simple tool which allows you to make HTTP requests with various parameters and save different set of collections which you can refer later or trigger again.
Newman is another tool from Postman developers which is a command line runner for API requests.
You’ll need to install both of these tools before moving forward.
Workflow
Our workflow is broken down in following steps:
#1 Creating some requests using Postman (Test definition)
Since we’re talking test driven development here, let’s first create a request (or test) in Postman along with our expected result. We don’t have any API yet but let’s do it anyway since we need to define behavior first.
We’ll first create a collection in Postman so that API can be shared with team later. In that collection, we’ll make some requests.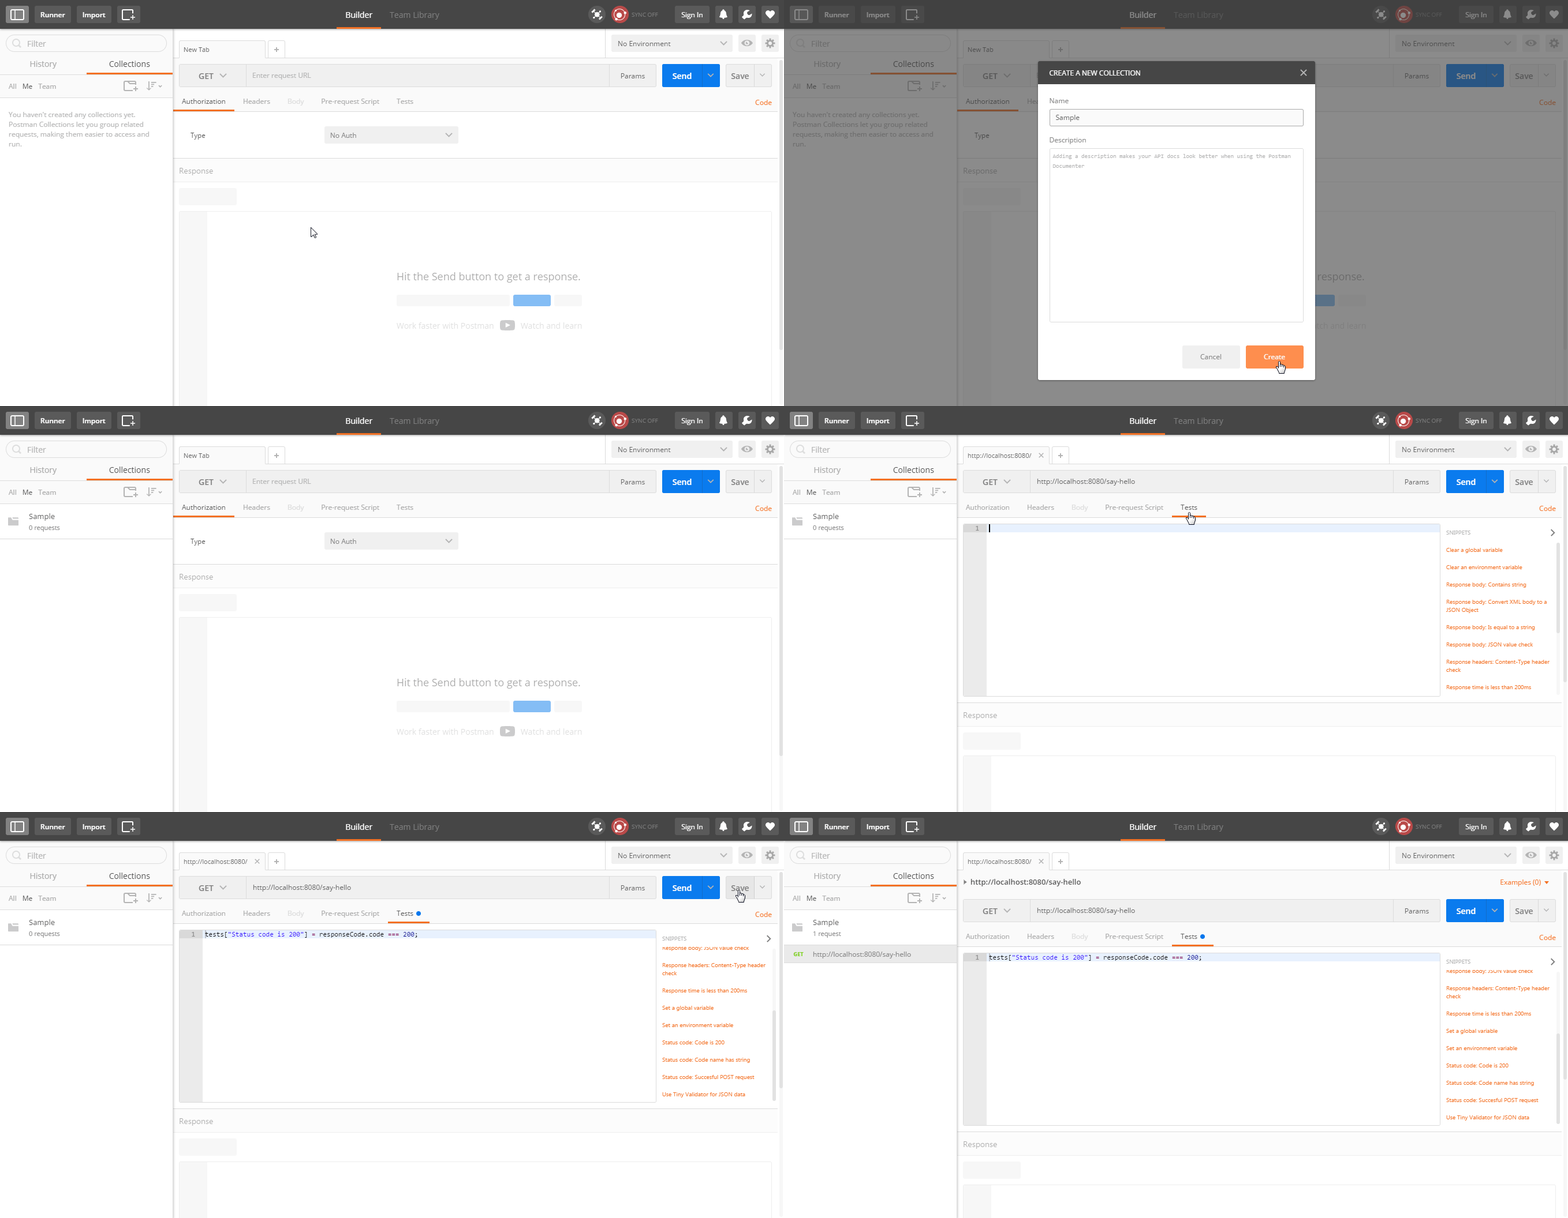
You can repeat these steps to document multiple end-points all at once or one-by-one.
#2 Automating requests with Newman
Now that we have some requests we’d like to execute, let’s see how we can automate them with our development environment. Right click on collection menu and export the whole collection to JSON file.
Your API collection can be exported to a json file.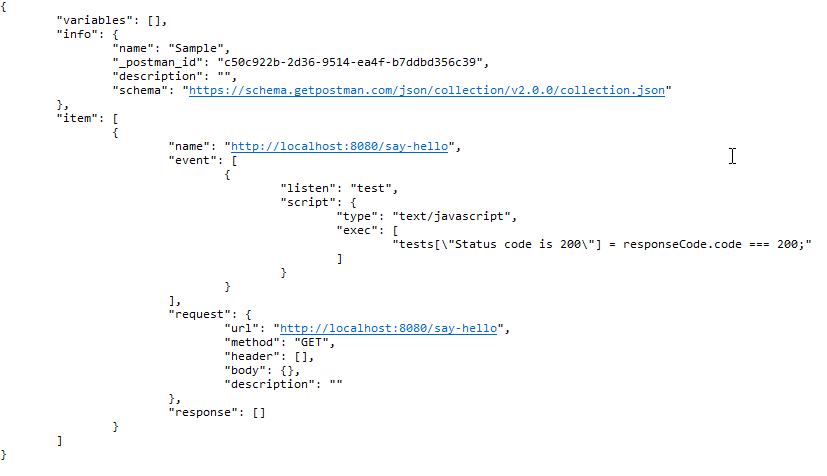
It’ll enable you to maintain your source code control workflow and collaboration.
Alternatively, you can also generate a shareable link to your collection which is what we’re going to use for speed. Go to share collection from the context menu, then Collection Link to do so.
Now let’s run this collection with following command:
newman run
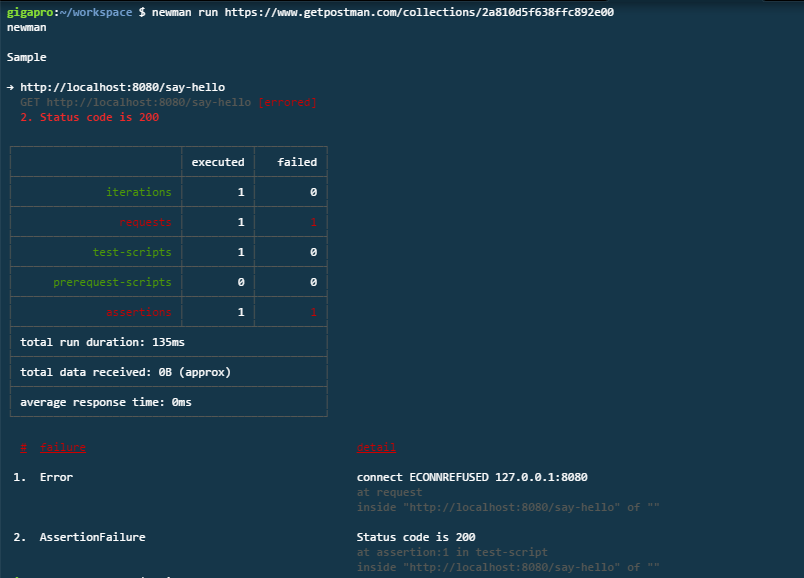
As we have no API running right now, there are 2 failures which are clearly shown.
Now let’s develop our sample API and run this again:
We’ll use simple node/express code here:
const express = require('express')
const app = express()
app.get('/say-hello', function (req, res) {
res.send('Hello World!')
})
app.listen(8080, function () {
console.log('Example app listening on port 3000!')
})
And run it with
node server.js
And run newman again: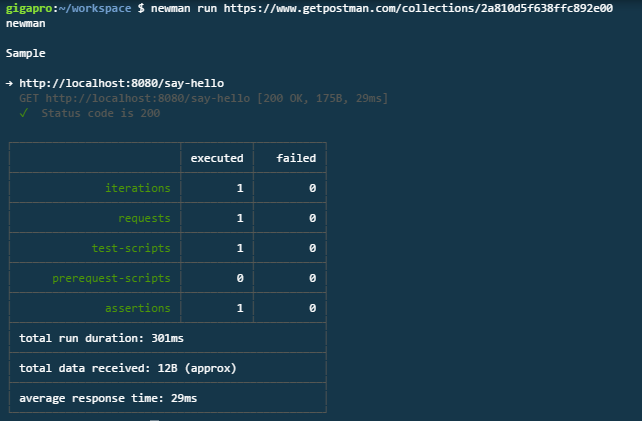
Note that I’m using URL as my JSON collection – for a typical development environment this would be a file in your local filesystem.
#3 Committing your work
Now you have API code + JSON collection, both are standard files which can be committed to any repository. You can decide any standard directory structure that works for you. For my example, I’ll choose:
/api (actual application)
/tests (for my collection file)
The good thing about having your collection file in source control is that all of your team members know how to call a particular API endpoint.
#4 Bonus: API doc generation from test cases
Another benefit is automatic documentation generation – Postman does a great job here. Each collection you upload to Postman server automatically gets a documentation page like this: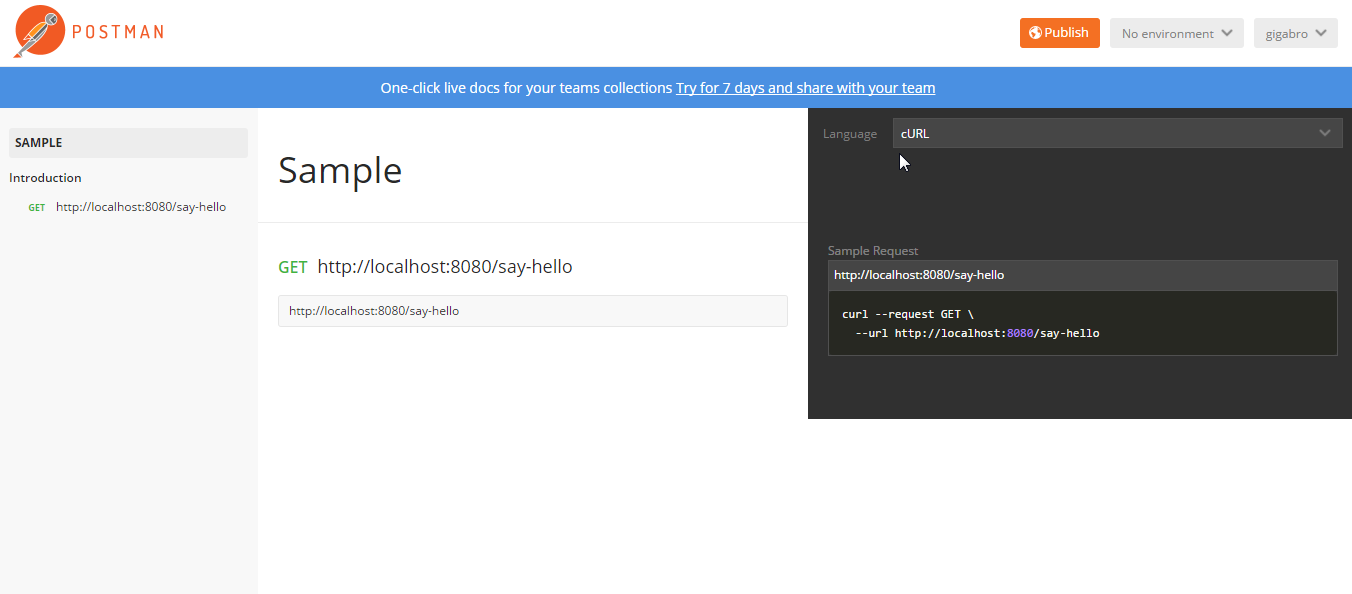
Apart from that, each collection file can be fed into a monitoring agent when you deploy to production. These are available in Postman pro edition but you can do this yourself too.
Conclusion
Tools like Postman and Newman combine both GUI and command line interfaces so APIs can be developed easily. It also makes TDD easier along with team collaboration without leaving our standard source code control tools.


