Custom test execution statuses in TestCollab let QA teams label results beyond Passed or Failed. This update helps your test management tool reflect real workflows, improve triage, and make cleaner release decisions in software testing.
How to create a custom test execution status
Why custom execution matters for QA software and software testing
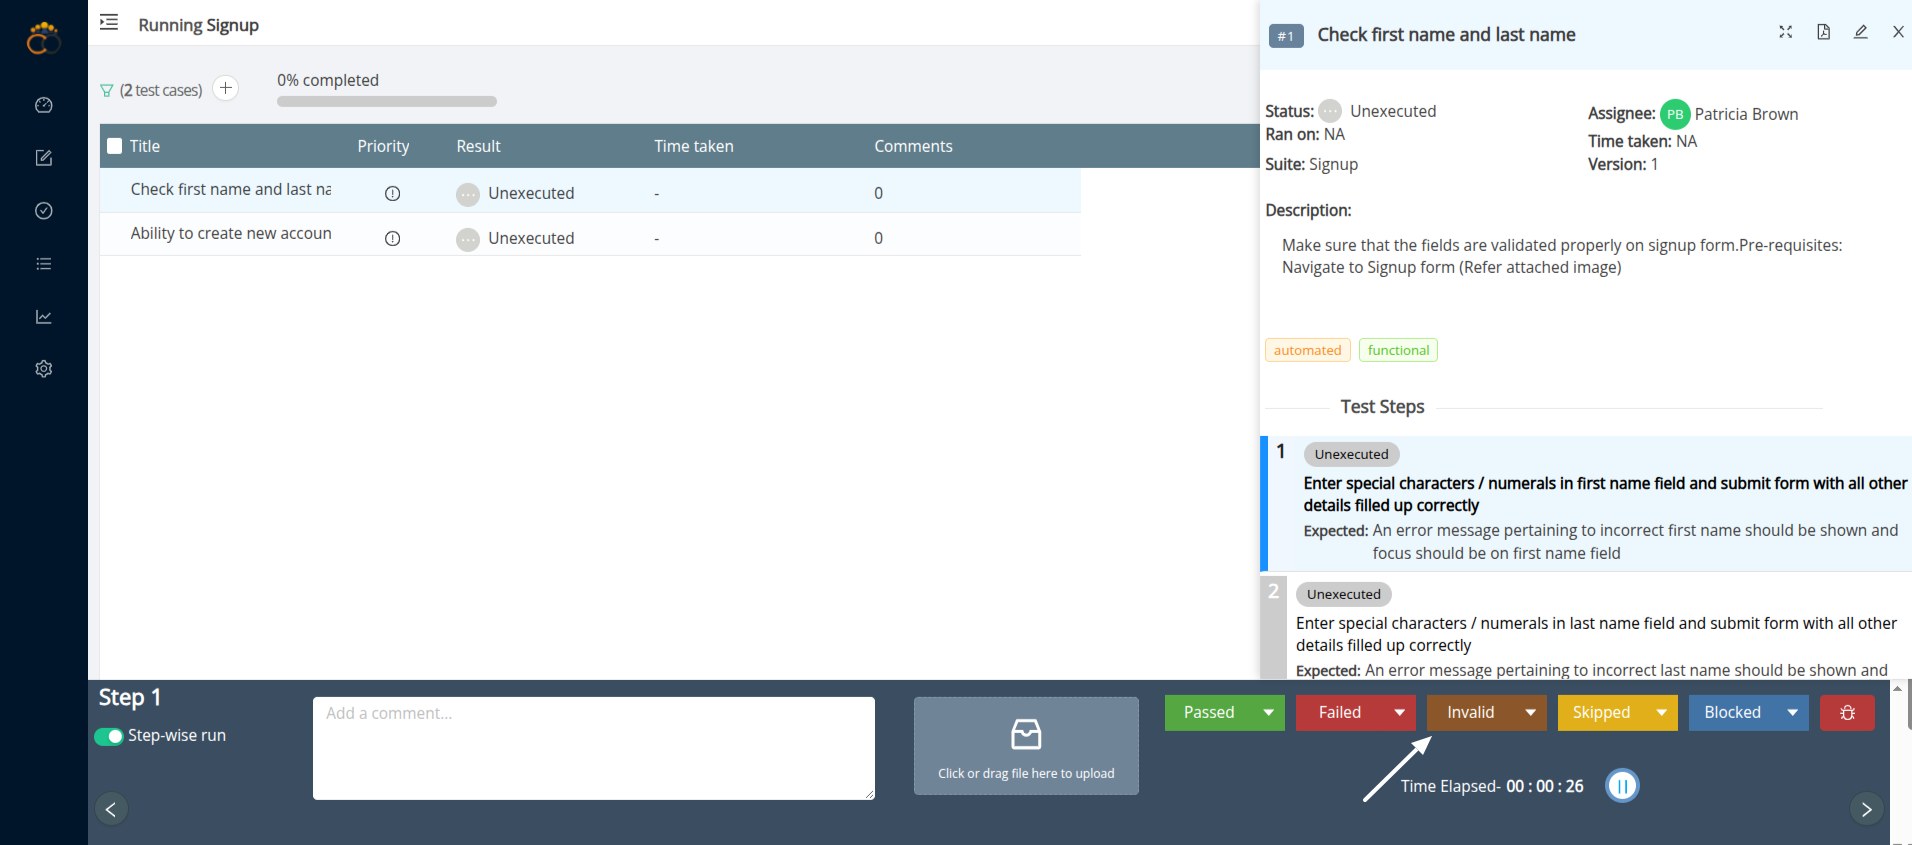
Execution status is the language your dashboards speak. If all blockers look the same and every exception is “Failed,” leaders lose signal. With custom test execution statuses you can call out Needs Review, Environment Issue, or Invalid, which speeds triage and clarifies ownership. The result is sharper insights, faster unblocks, and fewer surprises at go or no go time.
What ships by default in TestCollab
In our software, every project still has the built in set: Unexecuted, Passed, Failed, Skipped, Blocked. These stay consistent for reporting continuity. You extend them with your own statuses rather than replacing them. Details in the overview.
Default vs custom at a glance
Type
Set
Meaning
Examples
When to use
Built in
Unexecuted, Passed, Failed, Skipped, Blocked
Standard outcomes provided by TestCollab
N/A
Default workflow coverage
Custom
User created per project
You control name, color, priority, active state
Needs Review, Environment Issue, Flaky
Add nuance that matches your process
Note: defaults remain. Custom statuses extend them.
What you can customize
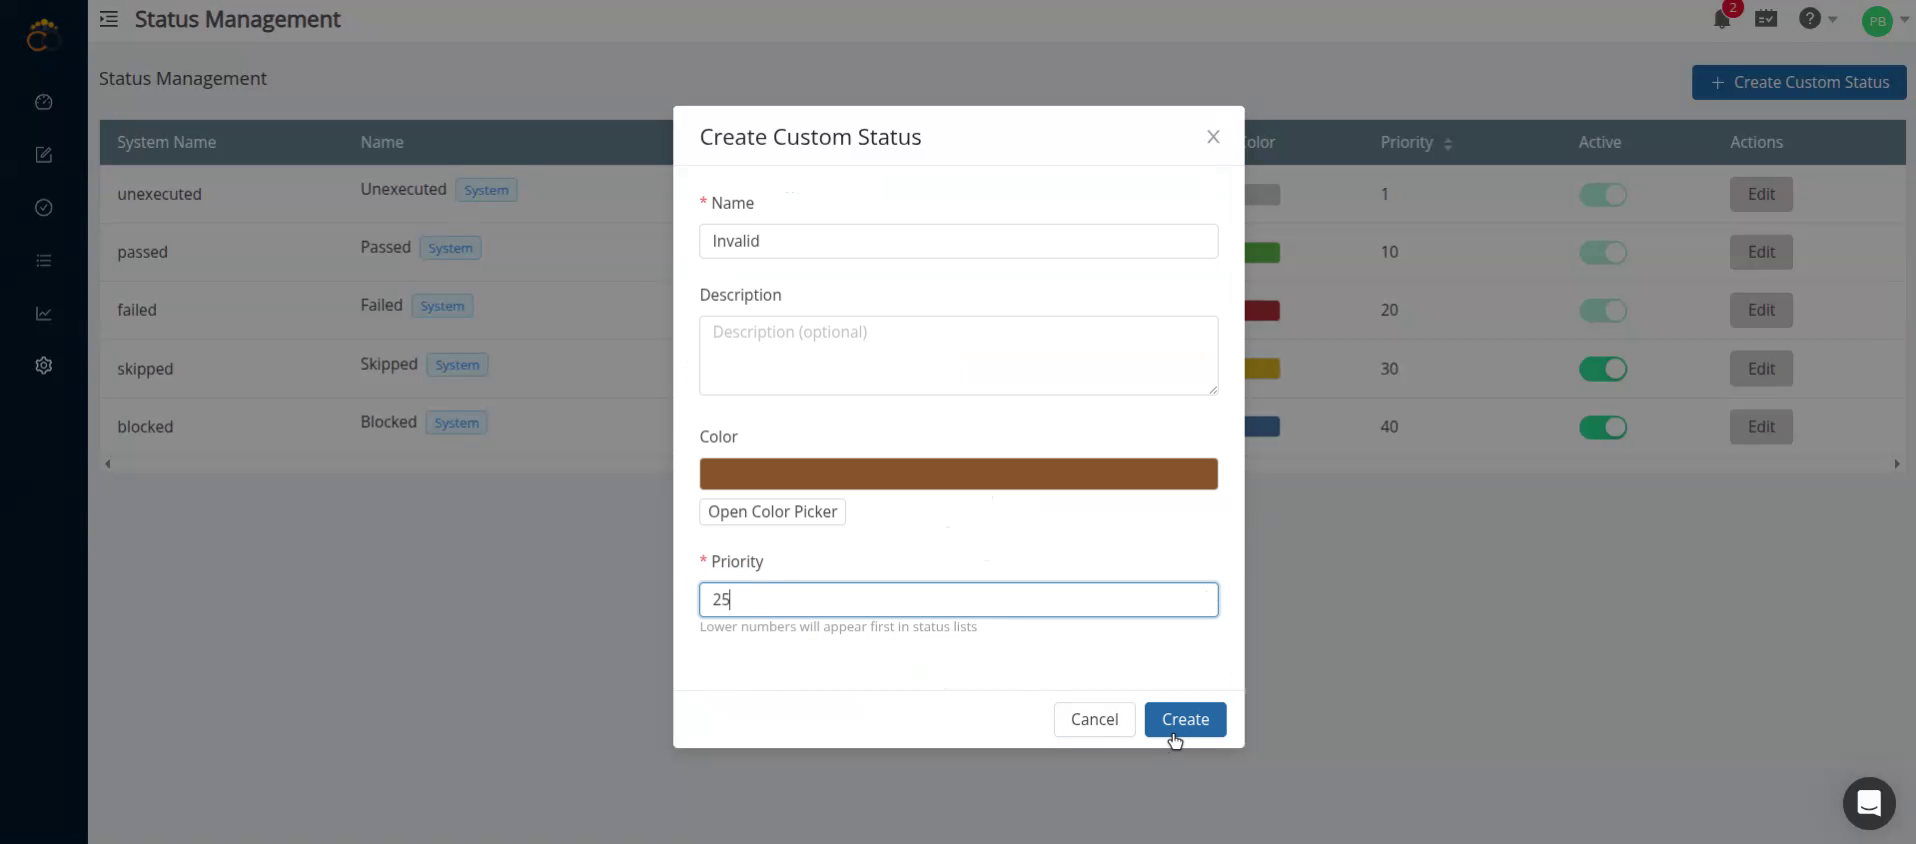 - Name and description so intent is clear
- Color for quick scanning in tables and charts
- Priority to control how mixed step results roll up to one result
- Active state so you can deactivate a status without losing history
Note: Unexecuted, Passed, and Failed are system locked. Skipped cannot be deactivated if QA Copilot is enabled. More in the guide.
Priority and rollup logic for custom test execution statuses
When a test case has mixed step results, the status with the highest priority becomes the overall result that appears in dashboards and reports. Rank your custom test execution statuses above or below defaults to match risk. See examples in the management guide.
Ready to try it on a real run? Start free trial.
Governance and safety rails
- Permissions: only Admins or roles with the Custom Statuses right can add, edit, deactivate, or delete
- Deactivate vs delete: once a status has been used, keep audit integrity by deactivating it instead of deleting
- Per project control: each project can have a different set that reflects its process maturity
Best practices that work for QA software teams
- Use self descriptive names anyone can understand
- Keep the list short and relevant
- Choose distinct colors that remain readable on light and dark backgrounds
- Review priorities whenever your process changes
- Train the team with a one page reference
12 real statuses teams add
Needs Review, Needs Retest, Environment Issue, Data Issue, Blocked by Dependency, Flaky, Pending Design, Known Limitation, Out of Scope, Invalid, Deferred, Duplicate.
These map cleanly to triage and ownership during busy sprints in software testing.
Reporting that tells the story in your QA software
Custom test execution statuses are first class in TestCollab reporting. You can split results by exact problem types, not just a single Failed bucket, which shortens the path to a fix. If outcomes must trace back to commitments, see requirements mapping. Planning data driven runs? Pair statuses with parameters and datasets.
API and automation tips for test management
Use numeric IDs or system names. For readability, prefer the System Name shown on the Custom Statuses page. Example: use needs_retest instead of guessing an ID. This plays well with CI pipelines and other software testing tools.
Rollout playbook
- Start small with 1 to 2 statuses that solve a clear pain
- Set priorities deliberately so mixed step results align with risk
- Train the team on when to use each status
- Audit after 2 weeks: remove unused, rename unclear
- Lock governance: limit edit rights to a few owners
Common questions
**Will this change my history?
**No. Deactivating a status hides it from future runs while preserving past results.
**Can I opt out?
**Yes. If defaults fit your flow, keep using them and ignore the custom set.
**Can different projects use different statuses?
**Yes. Configuration is per project, which helps when some teams are manual heavy and others automation heavy.
Availability and plan details
Custom Test Execution Statuses are available on the Elite plan and above. If you use Premium, you can trial Elite to evaluate whether features like parameters, datasets, and AI fit your roadmap. See plans and pricing.
Final thought
Labels shape decisions. With Custom Test Execution Statuses, your labels now match your work. Start with two or three high value statuses, set the right priorities, and watch your dashboards become decision ready.
Create your first custom test execution status in minutes and see cleaner reports on your next run. Start free trial