
Updated August 2026 - added client-by-client setup instructions for Claude Code, Claude Desktop, Cursor, Windsurf, and Codex.
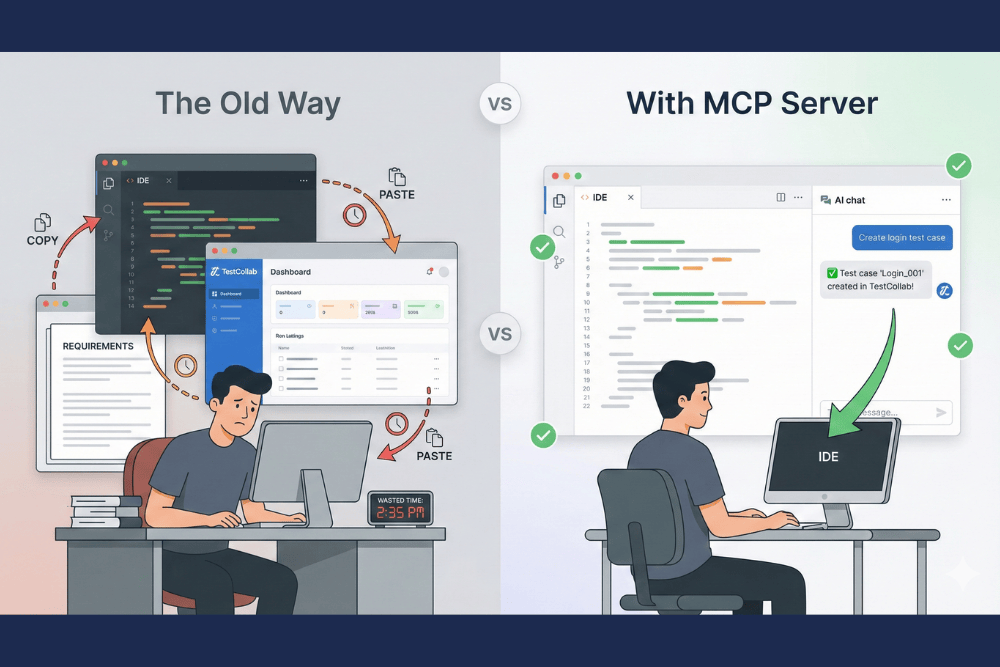
When we launched the TestCollab MCP Server, it supported three operations: list, create, and update test cases. That was enough to prove the concept - AI assistants could generate test cases while you code. But the feedback from early users was clear: they wanted to do more without leaving their editor.
Today, the MCP server supports 17 AI testing tools across test cases, test suites, and test plans. Here's what's new and the example prompts that make it useful.
Organize tests into suites
Test suites give your test cases structure. Previously, you could assign a test case to a suite, but you couldn't create or reorganize suites themselves. Now you can manage your entire suite hierarchy from your AI assistant.
Prompts you can try:
- "Create a new suite called 'Payment Processing' under the 'E-commerce' suite"
- "Show me the full suite tree for this project"
- "Move the 'Legacy Auth' suite under 'Authentication'"
- "Reorder the suites under 'API Tests' so 'Users' comes before 'Orders'"
- "Delete the empty 'Temp' suite"
This is particularly useful when you're setting up a new project or restructuring tests after a major refactor. Instead of clicking through the UI to create a dozen suites, describe the structure you want and let the AI build it.
Create and manage test plans
Test plans are how you organize test execution - which test cases to run, in what configurations, assigned to which testers. Managing these from an AI assistant means you can spin up a test plan as part of your development conversation.
Prompts you can try:
- "Create a regression test plan with all test cases tagged 'smoke'"
- "List all test plans created this month"
- "Show me the progress on test plan 'Sprint 42 Regression'"
- "Create a test plan called 'Login Refactor' with all test cases from the 'Authentication' suite, configured for Chrome and Firefox"
- "Archive the 'v2.1 Release' test plan"
The real power shows up when you combine this with test case creation. You can write a feature, generate test cases for it, and create a test plan - all in the same conversation.
AI test case generation in practice
Here's what a typical session looks like with the expanded MCP tools. You're working on a new checkout flow:
- "Create a suite called 'Checkout Flow' under 'E-commerce'" - Sets up the organizational structure first.
- "Create test cases for the checkout flow: adding items to cart, applying discount codes, selecting shipping method, and completing payment" - Generates four test cases with steps and expected results, placed in the new suite.
- "Create a test plan called 'Checkout Flow QA' with all test cases from the 'Checkout Flow' suite" - Bundles them into an executable plan.
- "Show me all high-priority test cases in the 'Checkout Flow' suite" - Quick coverage check before you push.
Four prompts, and you've gone from zero to a structured, plannable set of tests.
Full codebase test generation (YOLO mode)
Feeling brave? Enable auto-accept mode in your AI client - Claude Code's --dangerously-skip-permissions, Cursor's YOLO mode, etc. - point it at your entire codebase, and walk away. Go grab a coffee. Maybe two.
"Scan this entire codebase. Create suites mirroring the module structure and generate test cases with detailed steps for every feature you find."
The AI will read your source files, routes, controllers, and models, create a suite hierarchy matching your code structure, and generate test cases with steps for every feature it discovers. No prompting between steps. It just... keeps going.
What to expect when you get back:
| Codebase size | Approximate time | Output |
|---|---|---|
| Small (< 20 files) | ~5 minutes | 20-40 test cases across 5-10 suites |
| Medium (~50 files) | ~20-30 minutes | 50-100+ test cases across 15-25 suites |
| Large (100+ files) | ~45-60 minutes | 150+ test cases across 30+ suites |
A word of caution: Try this on a fresh TestCollab project first - not your production project with 500 carefully curated test cases. The AI will create a lot of suites and test cases, and you'll want to review the output before mixing it with your real data.
Want a complete hands-on walkthrough? Our step-by-step tutorial on automated test case generation with Claude Code takes you from setup to a fully populated test suite with real examples.
Suite structures and test case titles are generally solid - the AI infers these well from code structure and naming. But test steps for UI flows can get... creative. The AI hasn't actually seen your UI, so it's doing its best impression of someone who read the docs but never opened the app. Review before you run.
For best results, give your TestCollab project a detailed project description - specify your application type, tech stack, and key user roles. The more context you provide upfront, the less fiction you'll find in the output.
MCP server setup
The MCP server no longer requires a hosted endpoint. It runs locally via npx with environment variable authentication - no HTTP headers, no remote server dependency. All you need is Node.js 20+ and two values from TestCollab:
- API token: in TestCollab, click your profile avatar, open My Profile Settings, go to the API Token tab, and click Generate new API token.
- Project ID: the number in your project URL, e.g.
testcollab.io/project/16/manage.
Every client below uses the same three environment variables: TC_API_TOKEN (required), TC_API_URL (https://api.testcollab.io, or https://api-eu.testcollab.io if your account is hosted in the EU), and TC_DEFAULT_PROJECT (optional, but set it so you don't have to name the project in every prompt).
One rule before you start: keep the token in user-level config files only. Never put it in a project-level MCP file that gets committed to source control.
Here's the setup for each client.
Claude Code
One command in your terminal:
claude mcp add testcollab \
  -e TC_API_TOKEN=your-api-token \
  -e TC_API_URL=https://api.testcollab.io \
  -e TC_DEFAULT_PROJECT=16 \
  -- npx -y @testcollab/mcp-server
By default this stores the config in your user-level ~/.claude.json, scoped to the current project, so the token stays out of your repo. Add --scope user if you want the server available in every project. Start a new Claude Code session and the TestCollab tools are ready.
Claude Desktop
Add the server to Claude Desktop's config file:
- macOS:
~/Library/Application Support/Claude/claude_desktop_config.json - Windows:
%APPDATA%\Claude\claude_desktop_config.json
{
  "mcpServers": {
    "testcollab": {
      "command": "npx",
      "args": ["-y", "@testcollab/mcp-server"],
      "env": {
        "TC_API_TOKEN": "your-api-token",
        "TC_API_URL": "https://api.testcollab.io",
        "TC_DEFAULT_PROJECT": "16"
      }
    }
  }
}
Claude Desktop starts the server in its own process, so the token must be present in this file's env object - it won't inherit variables from your shell. Fully quit and reopen Claude Desktop after saving.
Cursor
Add the same JSON to Cursor's global MCP file: ~/.cursor/mcp.json on macOS and Linux, or %USERPROFILE%\.cursor\mcp.json on Windows. Skip the project-level .cursor/mcp.json here - that file tends to get committed, and your token would go with it.
{
  "mcpServers": {
    "testcollab": {
      "command": "npx",
      "args": ["-y", "@testcollab/mcp-server"],
      "env": {
        "TC_API_TOKEN": "your-api-token",
        "TC_API_URL": "https://api.testcollab.io",
        "TC_DEFAULT_PROJECT": "16"
      }
    }
  }
}
Save the file, fully quit Cursor, and reopen it.
Windsurf
Add the server to ~/.codeium/windsurf/mcp_config.json on macOS and Linux, or %USERPROFILE%\.codeium\windsurf\mcp_config.json on Windows:
{
  "mcpServers": {
    "testcollab": {
      "command": "npx",
      "args": ["-y", "@testcollab/mcp-server"],
      "env": {
        "TC_API_TOKEN": "your-api-token",
        "TC_API_URL": "https://api.testcollab.io",
        "TC_DEFAULT_PROJECT": "16"
      }
    }
  }
}
Restart Windsurf after saving.
Codex
Register the server from the command line:
codex mcp add testcollab \
  --env TC_API_TOKEN=your-api-token \
  --env TC_API_URL=https://api.testcollab.io \
  --env TC_DEFAULT_PROJECT=16 \
  -- npx -y @testcollab/mcp-server
Or edit ~/.codex/config.toml directly - the Codex CLI, the desktop app, and the IDE extension all share this file:
[mcp_servers.testcollab]
command = "npx"
args = ["-y", "@testcollab/mcp-server"]

[mcp_servers.testcollab.env]
TC_API_TOKEN = "your-api-token"
TC_API_URL = "https://api.testcollab.io"
TC_DEFAULT_PROJECT = "16"
Run codex mcp list to confirm the server is registered, then restart Codex.
Any other MCP client
The server is a standard stdio MCP server, so any MCP-compatible client can run it. Map the JSON config above into your client's own MCP config format. (Watch the key names: VS Code's mcp.json, for example, uses a top-level servers key instead of mcpServers.)
Verify it works
Restart your client and ask: "What tools do you have for TestCollab?" You should see the TestCollab tools listed. If the server doesn't show up, check that Node.js 20+ is installed (node --version) and see the setup guide for troubleshooting.
All 17 MCP tools at a glance
| Area | Tools |
|---|---|
| Test cases | list, get, create, update |
| Test suites | list, get, create, update, delete, move, reorder |
| Test plans | list, get, create, update, delete |
| Project context | get project context (suites, tags, users, custom fields) |
The project context tool deserves a quick mention - it loads your suite tree, tags, users, and custom fields at the start of a conversation so you can reference everything by name. Say "list test cases in the Login suite" instead of "list test cases in suite 47."
More example prompts for AI testing
Beyond the basics, here are prompts that show the depth of what's possible:
- "What test cases exist for the password reset feature?"
- "Update test case 1502 - the expected status code changed from 200 to 201"
- "Create a test case for the new /api/users endpoint with steps for GET, POST, and DELETE"
- "List all test plans with status 'active'"
- "Show me test cases tagged 'flaky' with priority high"
- "Create a suite structure: API Tests > Users, Orders, Products"
What's next
The MCP server is open source on GitHub and available as an npm package. We're actively working on test execution recording and deeper CI/CD integration.
Try it out, and let us know what workflows you build. Visit the MCP Server integration page for the full setup guide and capability reference.