

On this page
Scoring risks only pays off when the scores change what you test next. The Risk Register already knows which test cases cover which risks, so it can build the plan for you: narrow the register to the risks you care about, click Create Test Plan, and TestCollab seeds the usual create test plan wizard with every test case linked to those risks.
Before you start
-
Risk-Based Testing is an Enterprise plan feature. See Introduction to Risk-Based Testing.
-
Your role needs the Create test plans permission (under Test Plans in Roles). Without it the button stays disabled.
-
Your risks need linked test cases. A risk with nothing linked to it contributes no test cases, so link them first: Linking Risks for Traceability.
Step 1 - Narrow the register to the risks you want to test
Open Risks in the left sidebar and stay on the Register tab. The plan is built from the risks the register is showing, so this step decides what goes into it. Use any combination of:
-
The search box ("Search risks by ID, title or description").
-
The view toggle: All risks, Uncovered, or Failing tests. The count next to the last two tells you how many risks are in that state.
-
Any column filter - exposure band, residual band, status, type, likelihood, impact, owner, or the linked requirements, test cases, and defects.
💡 The most useful starting point is Exposure = Critical: it gives you a plan that covers only what could hurt customers most. Failing tests is the other one worth knowing - it gives you a retest plan for the risks whose tests last reported a failure.
The plan uses every risk that matches, not just the page you are on. If your filter leaves 47 risks across 5 pages, all 47 are used.
Step 2 - Click Create Test Plan
The Create Test Plan button sits in the register toolbar, between the view toggle and the Columns selector. Hover it and the tooltip tells you exactly what you are about to get, for example "Create a test plan from the 18 test cases linked to the risks shown below".
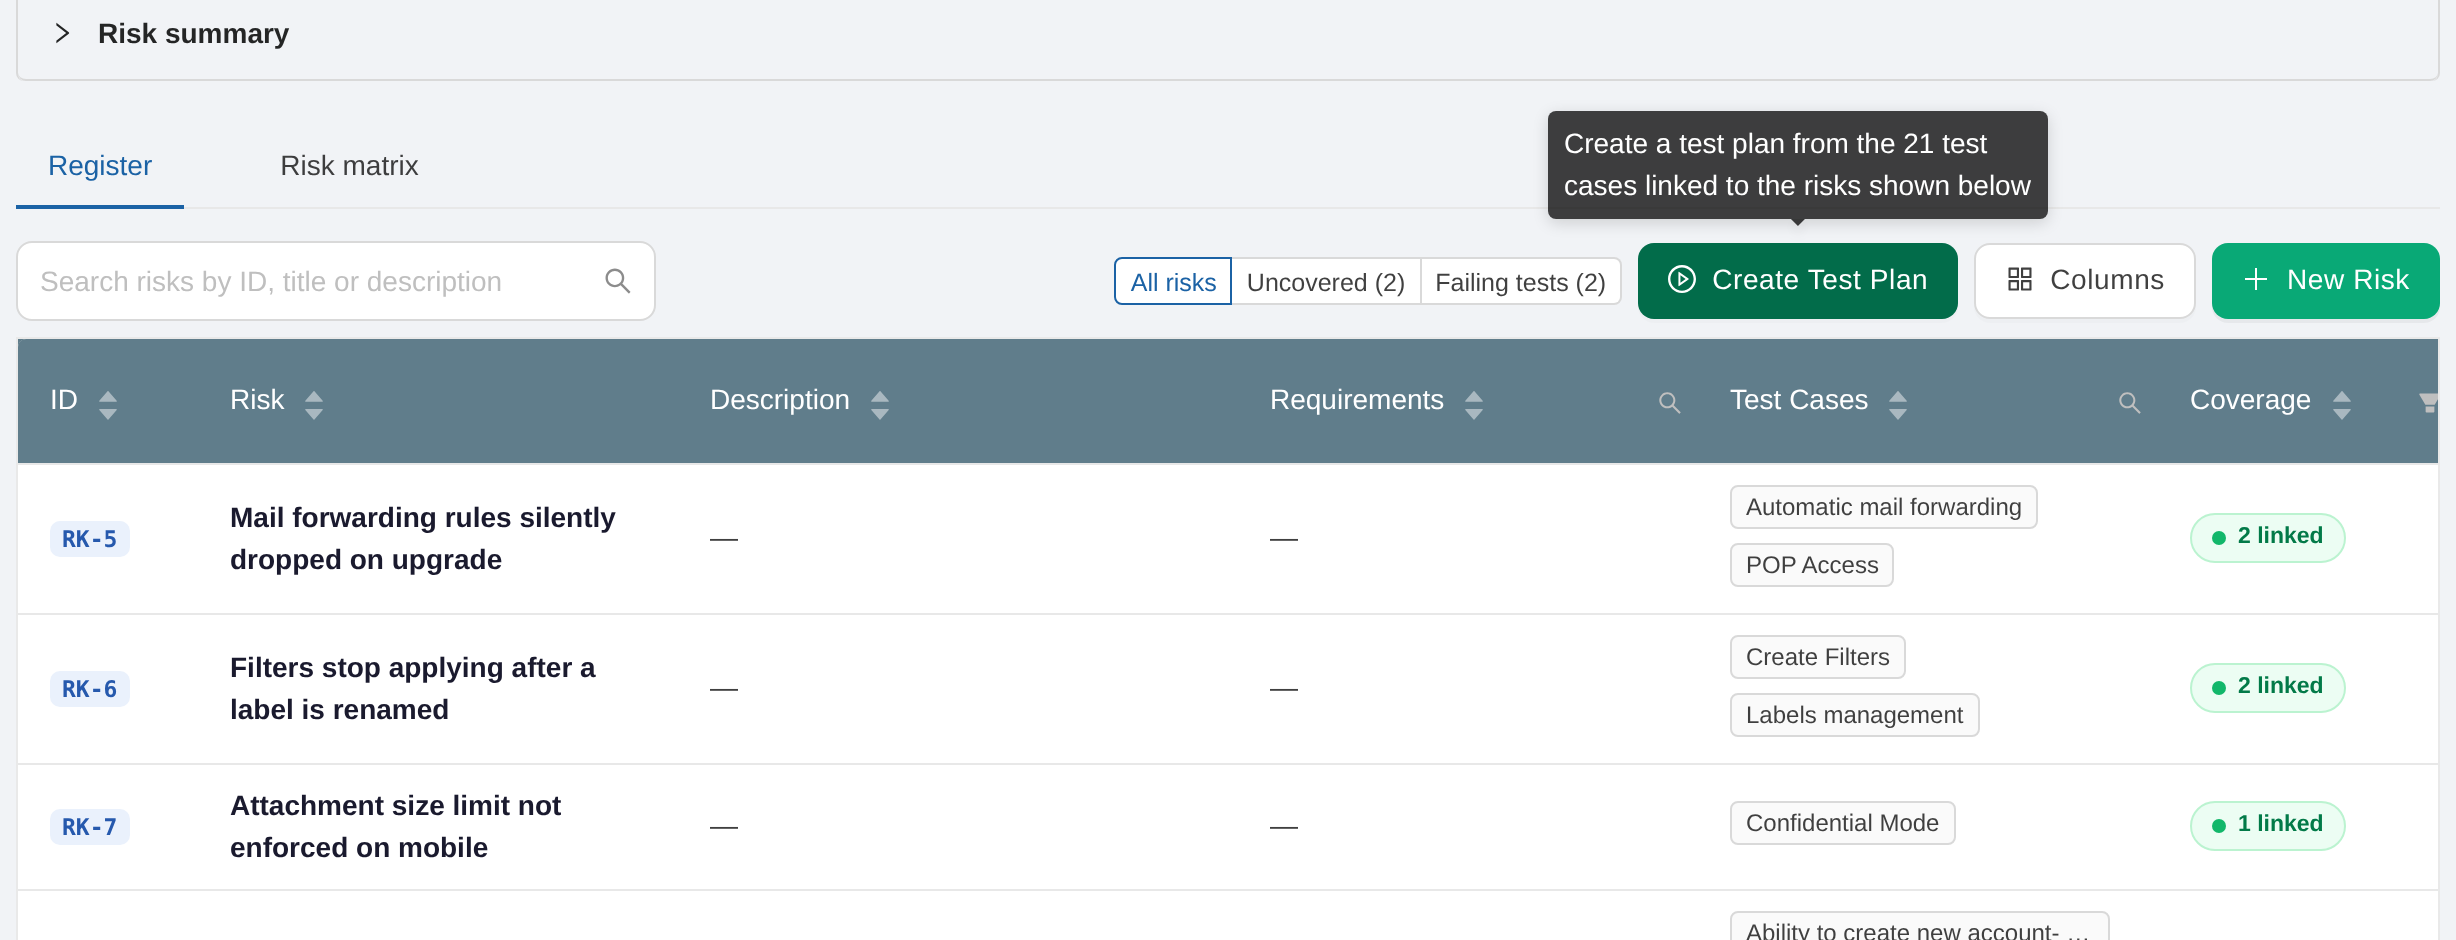
TestCollab then collects the test cases for you:
-
It takes the test cases linked to each risk on screen and removes the duplicates. A test case that covers three of those risks is added to the plan once.
-
It uses test cases only. Requirements and defects linked to the same risks are not added to the plan.
The button is disabled when none of the risks on screen has a linked test case. The tooltip then reads "The risks shown below have no linked test cases", which usually means you should switch to the Uncovered view and write the missing tests first.
Step 3 - Fill in the plan
A dialog opens, titled Create test plan from 12 risks (with your own count). If some of those risks have no test case behind them, a warning at the top says so, for example "3 risks have no linked test case, so they are not represented in this plan." The plan is still created; those risks simply contribute nothing to it.
Under the title, a green line confirms the size of the plan: This test plan will include N test cases. From here it is the standard wizard, with three steps:
-
Basic Information - title, start and due dates, priority, folder, and description. If your project uses builds and releases, you can pick those here too.
-
Configurations - browsers, environments, and other variations.
-
Assignment - who runs the cases.
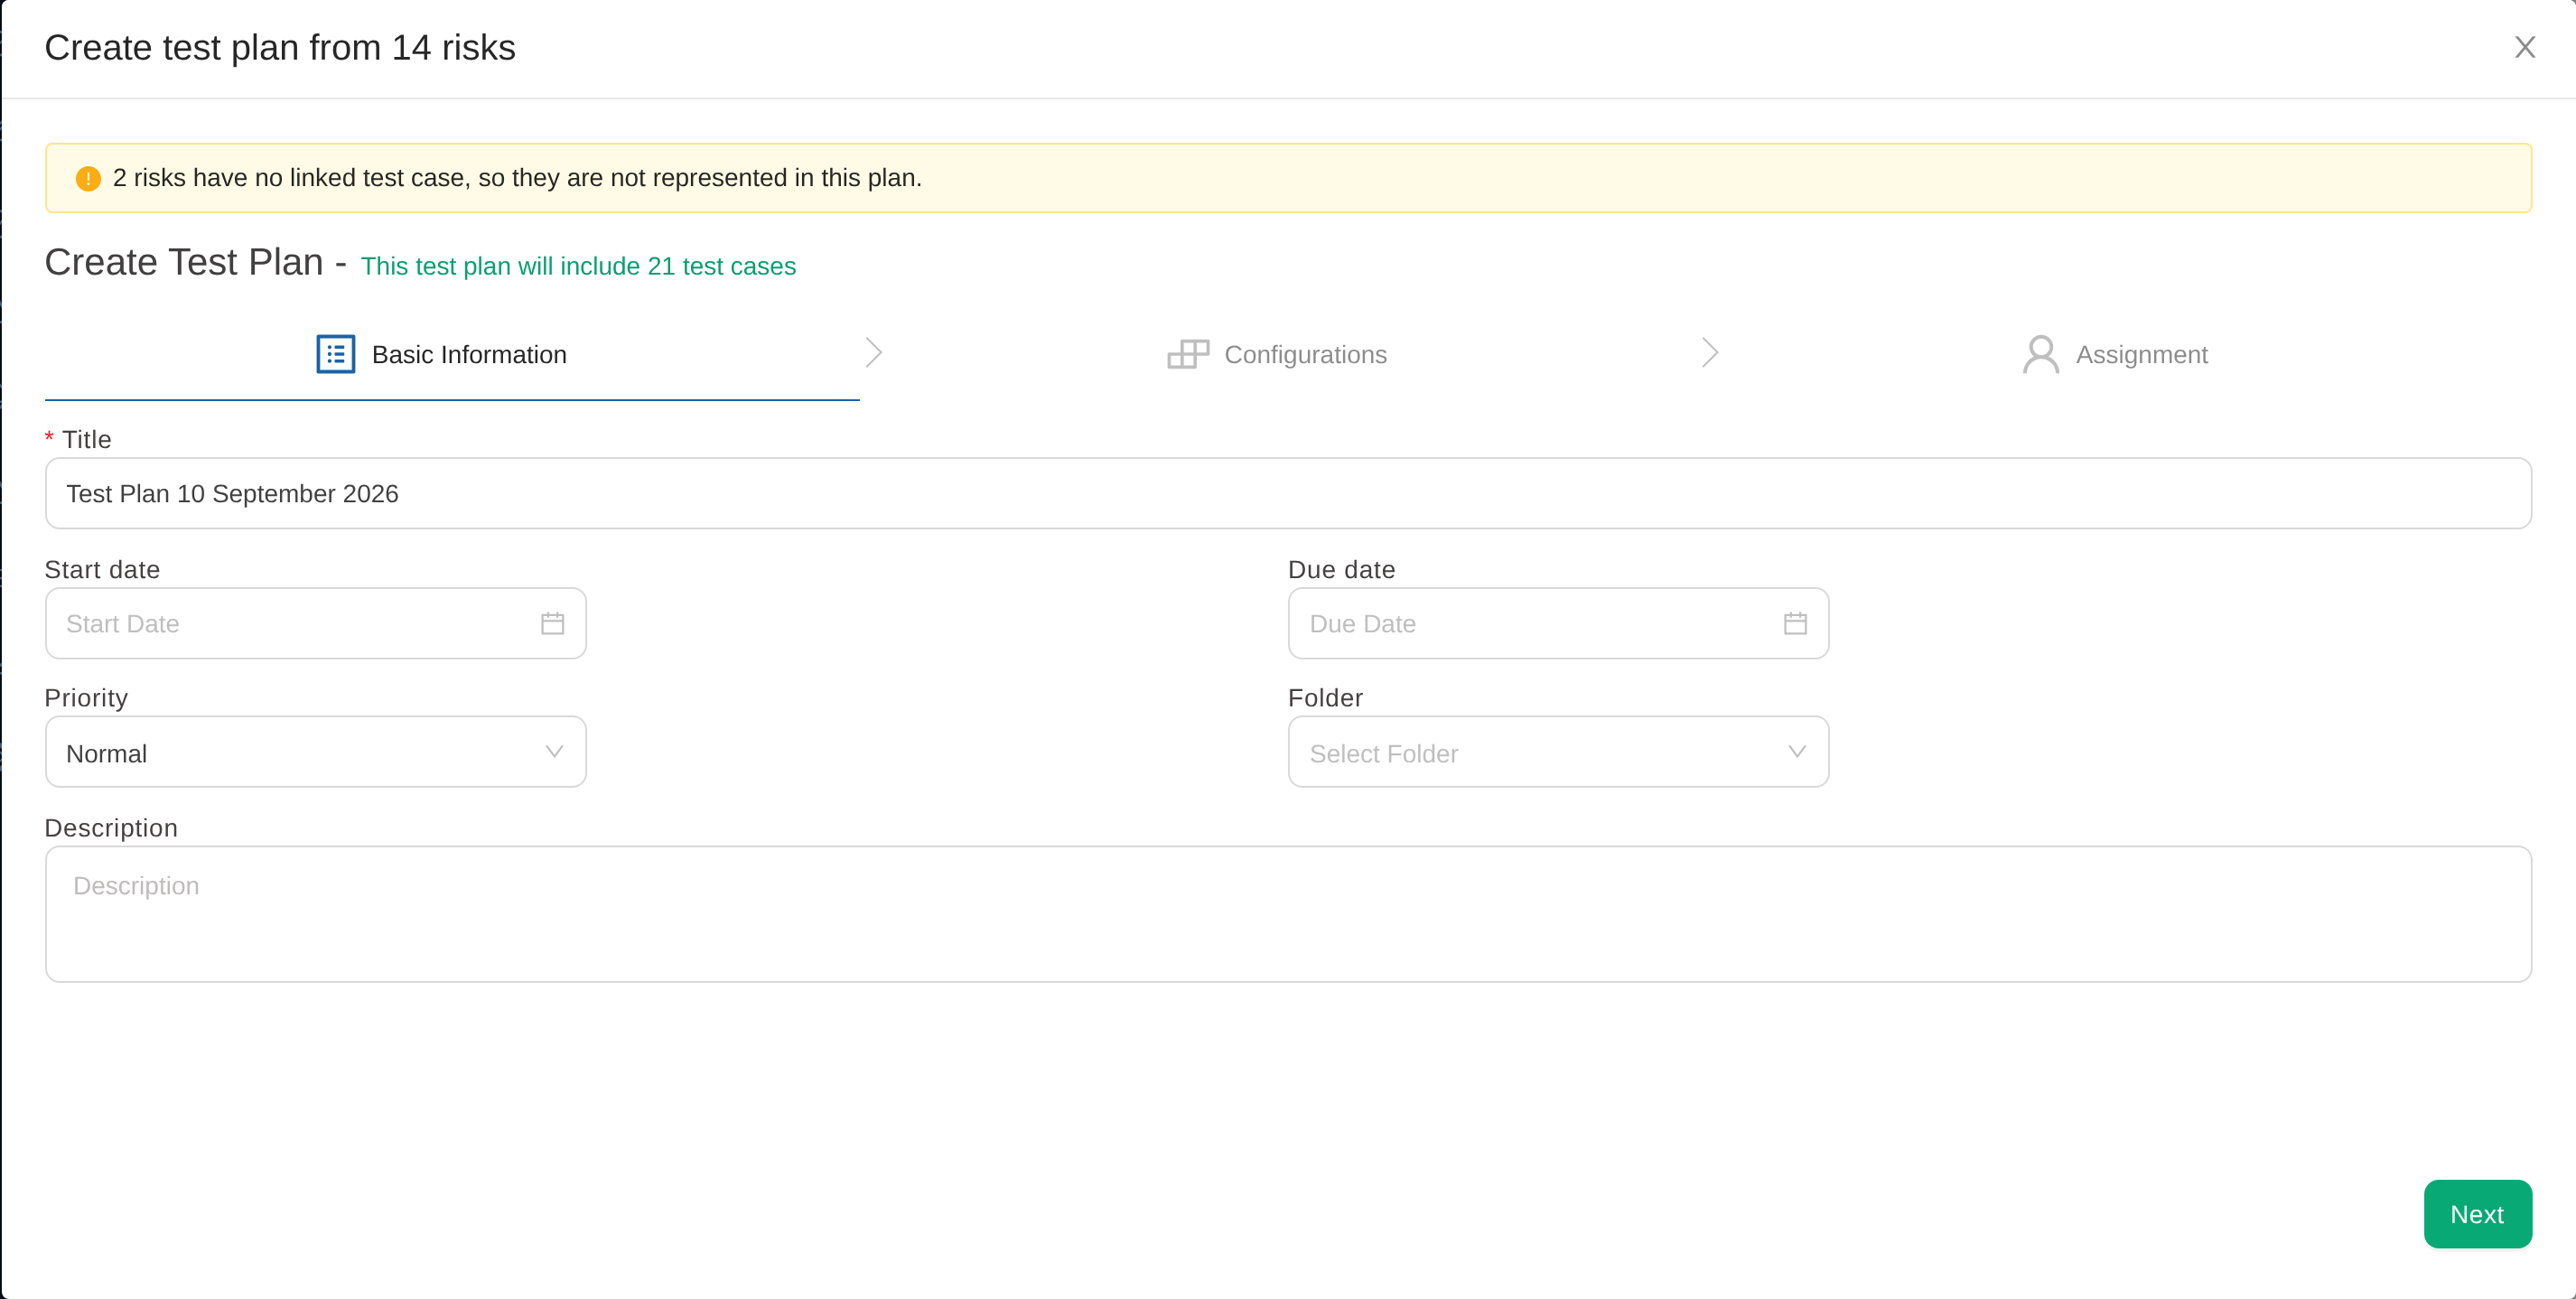
There is no "select test cases" step here, because the register already chose them. Every field behaves exactly as described in Creating Test Plans. After the Assignment step you get the usual confirmation screen with a link to open the new plan.
The plan is a snapshot, not a live link
The test cases are copied into the plan at the moment you create it. If you later link more test cases to one of those risks, they do not appear in the plan by themselves. Add them the normal way (see Adding and Removing Test Cases from Test Plan), or create a fresh plan from the register.
See the risk behind each test case in the plan
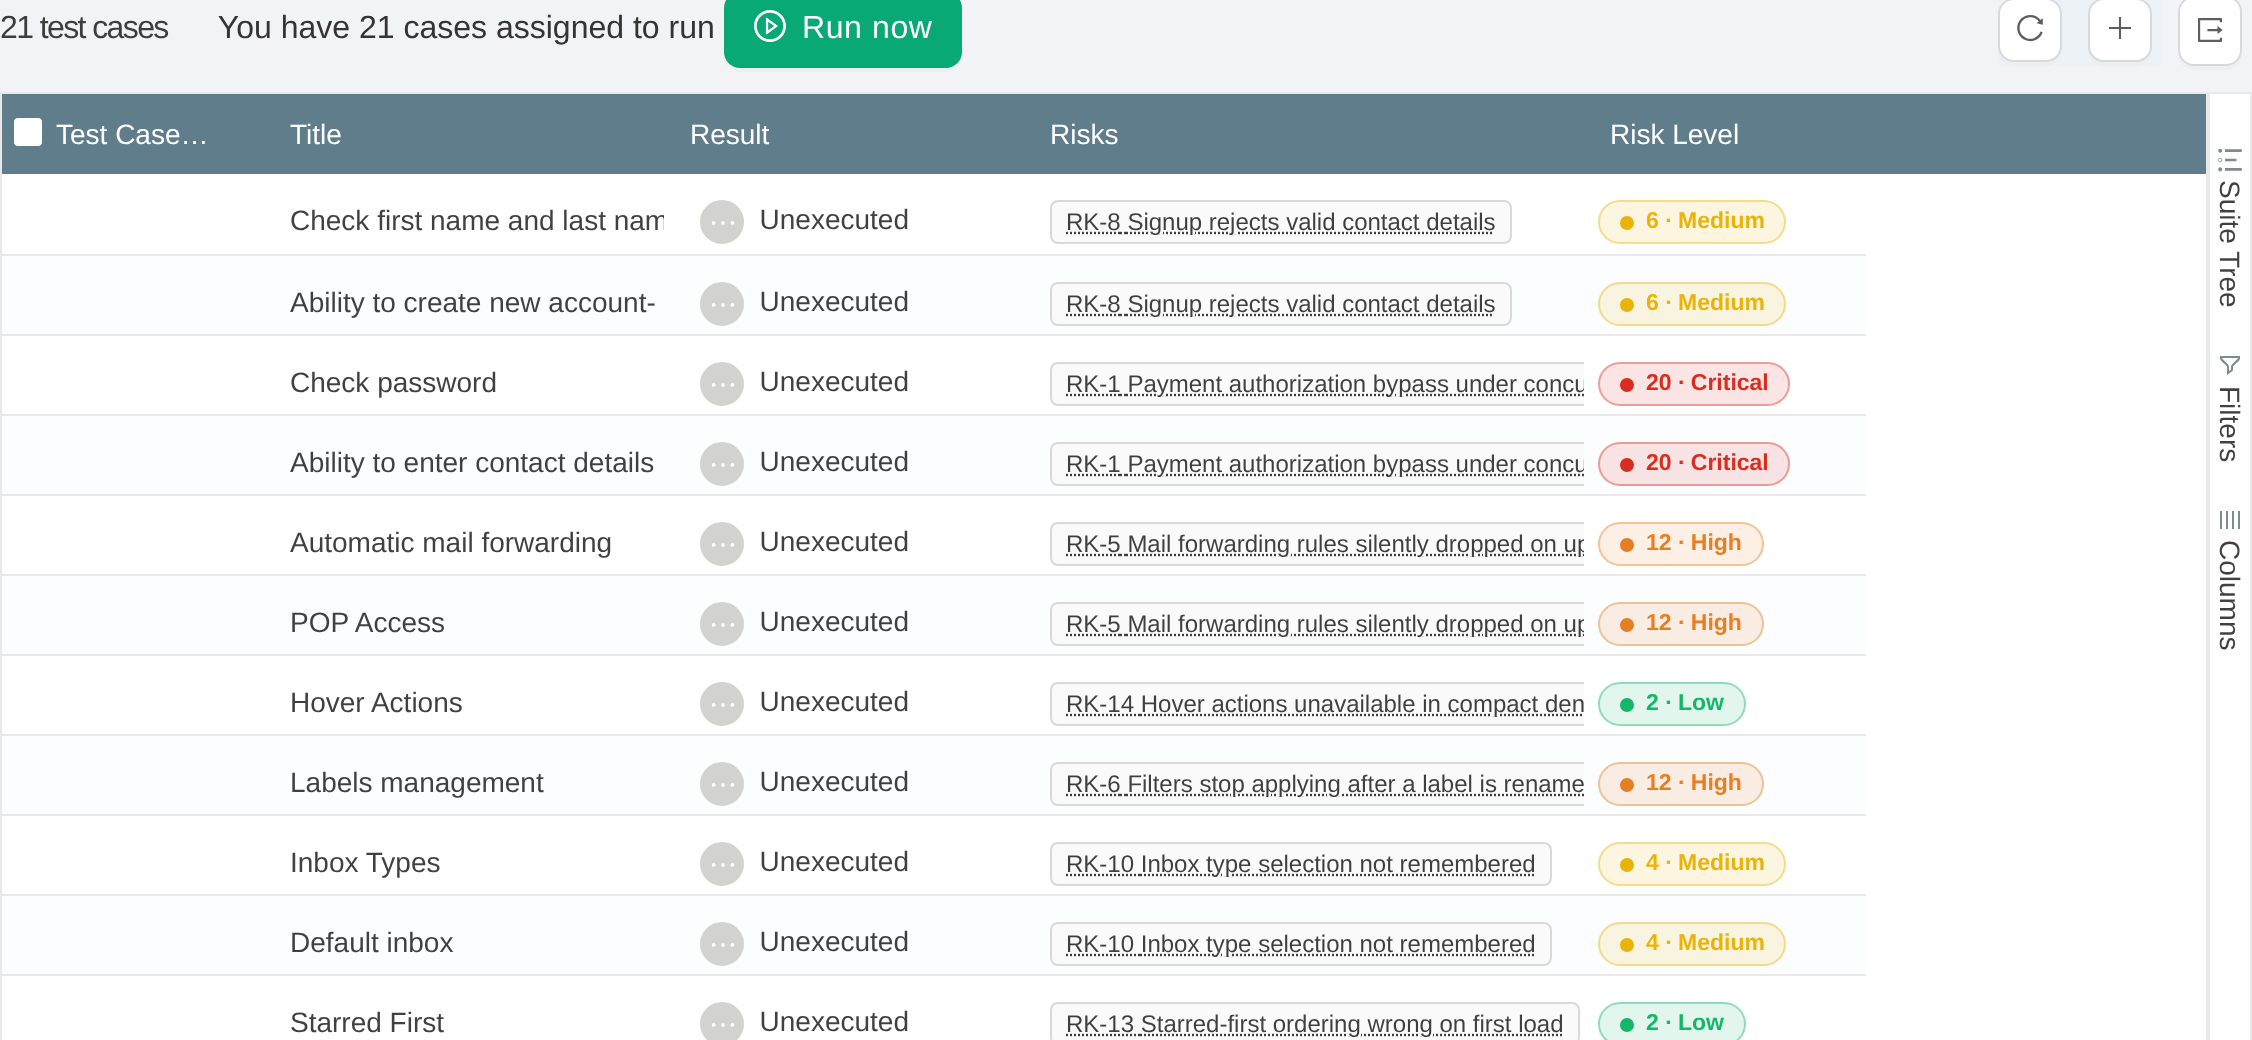
Open the plan and go to its Test Cases tab. Two columns tell you why each case is there:
-
Risks - the risks linked to that test case.
-
Risk Level - the highest risk level among them, shown as the exposure number and its band, for example 20 · Critical.
If you do not see them, turn them on from the column selector. Sorting by Risk Level puts the most dangerous cases at the top of the run, which is a good way to decide what to execute first when time runs short.
What the run changes back in the register
Running the plan does not change Coverage. A risk is covered when at least one test case is linked to it, whether or not anyone has run that test case.
What the run does change is Verification, the column that reports what those linked test cases last said:
-
Failing - at least one linked test case last failed.
-
Not run - the linked test cases exist, but none has passed yet.
-
Partly verified - some passed, and some are still not run.
-
Passing - every linked test case last passed.
-
No tests - nothing is linked, so there is nothing to report.
That closes the loop: score the risks, build a plan from the dangerous ones, run it, and the register tells you which risks are actually verified and which still are not.