
This article describes the steps to be performed by the Entra administrator, in the Azure portal.
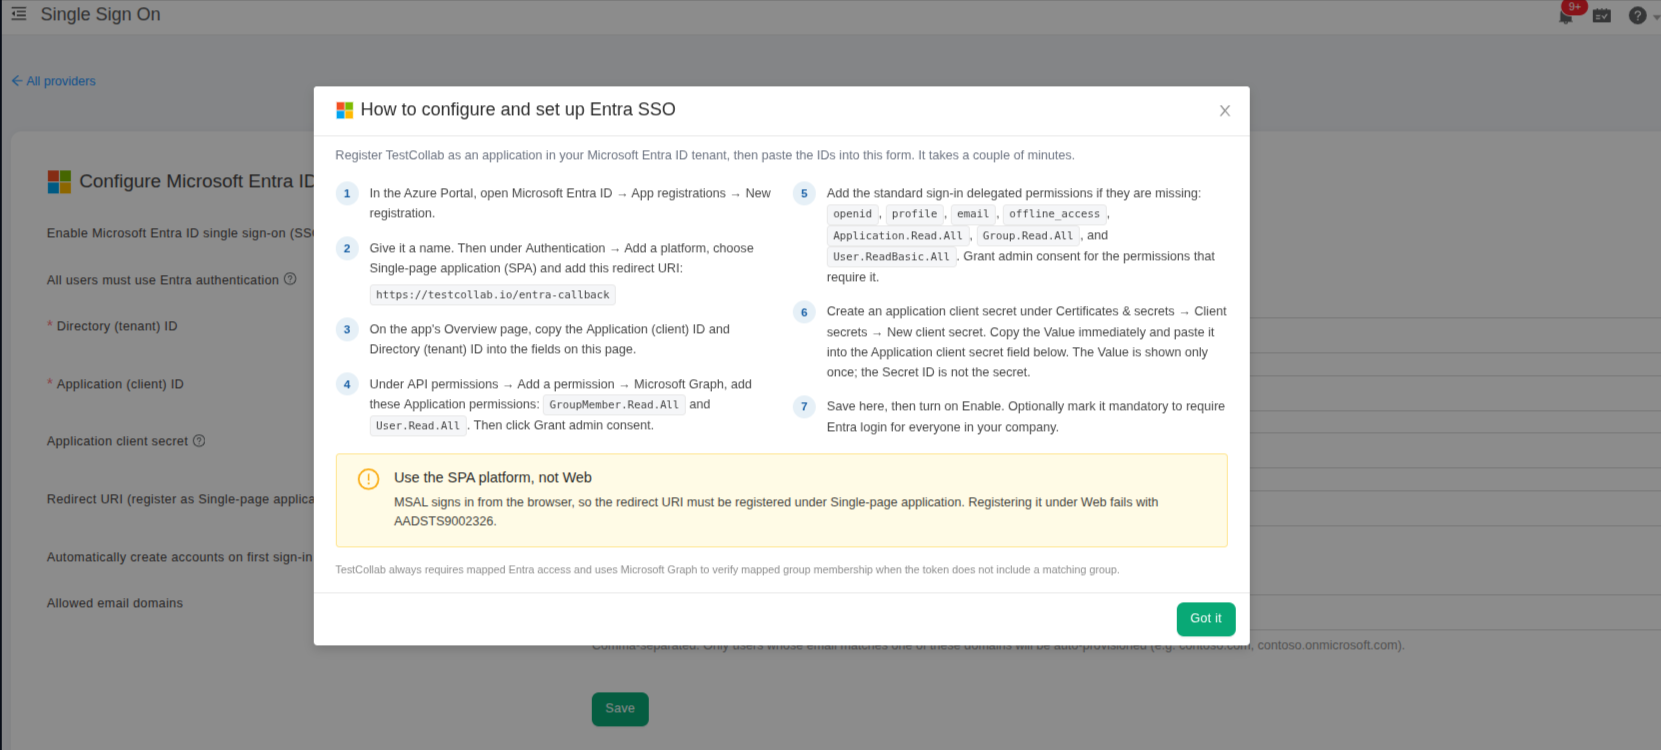
TestCollab shows these same steps inside the product. On the single sign-on settings page, select How to configure and setup Entra SSO to open them next to the form you are filling in.
Step 1 - Create an Enterprise application
-
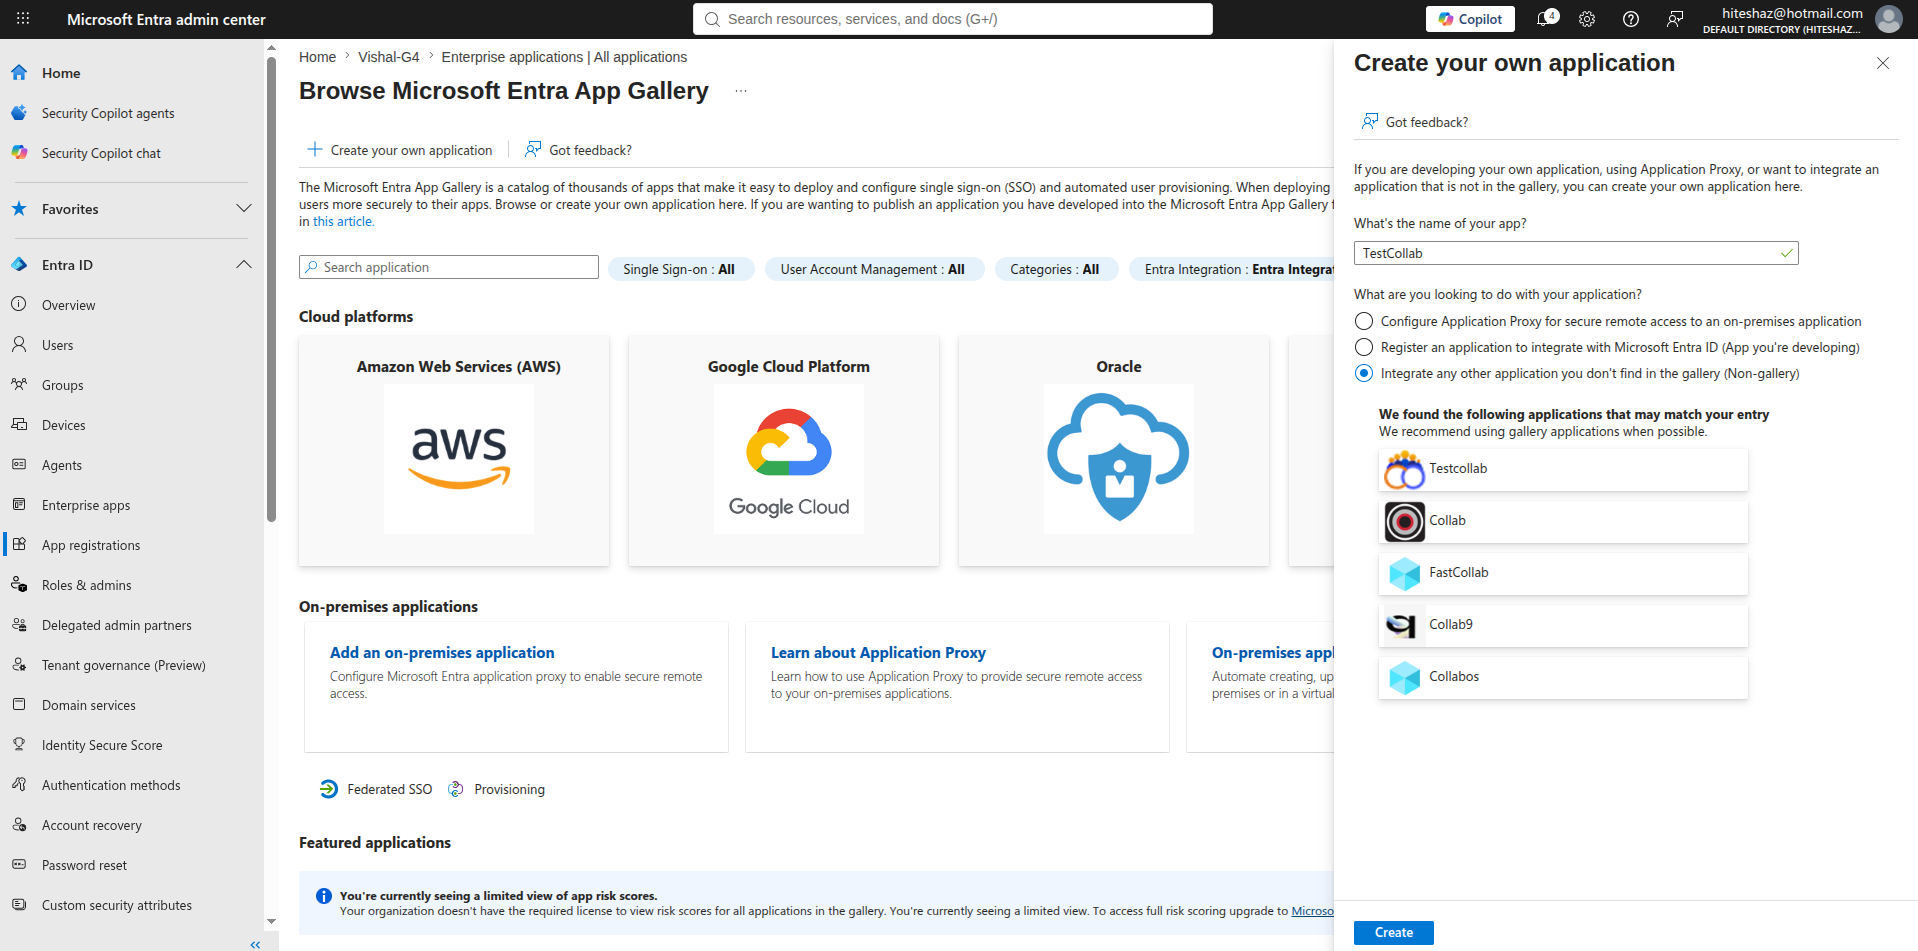
In the Azure portal, go to Microsoft Entra ID → Enterprise Apps → New Application
-
On Microsoft Entra App Gallery page click Create your own application
Give it a name your team will recognise, such as TestCollab
-
Select "Integrate any other application you don't find in the gallery (Non-gallery)"
Step 2 - Add the sign-in address
-
In TestCollab, go to Enterprise → Single Sign On → Microsoft Entra ID and copy the read-only value labelled Redirect URI.
-
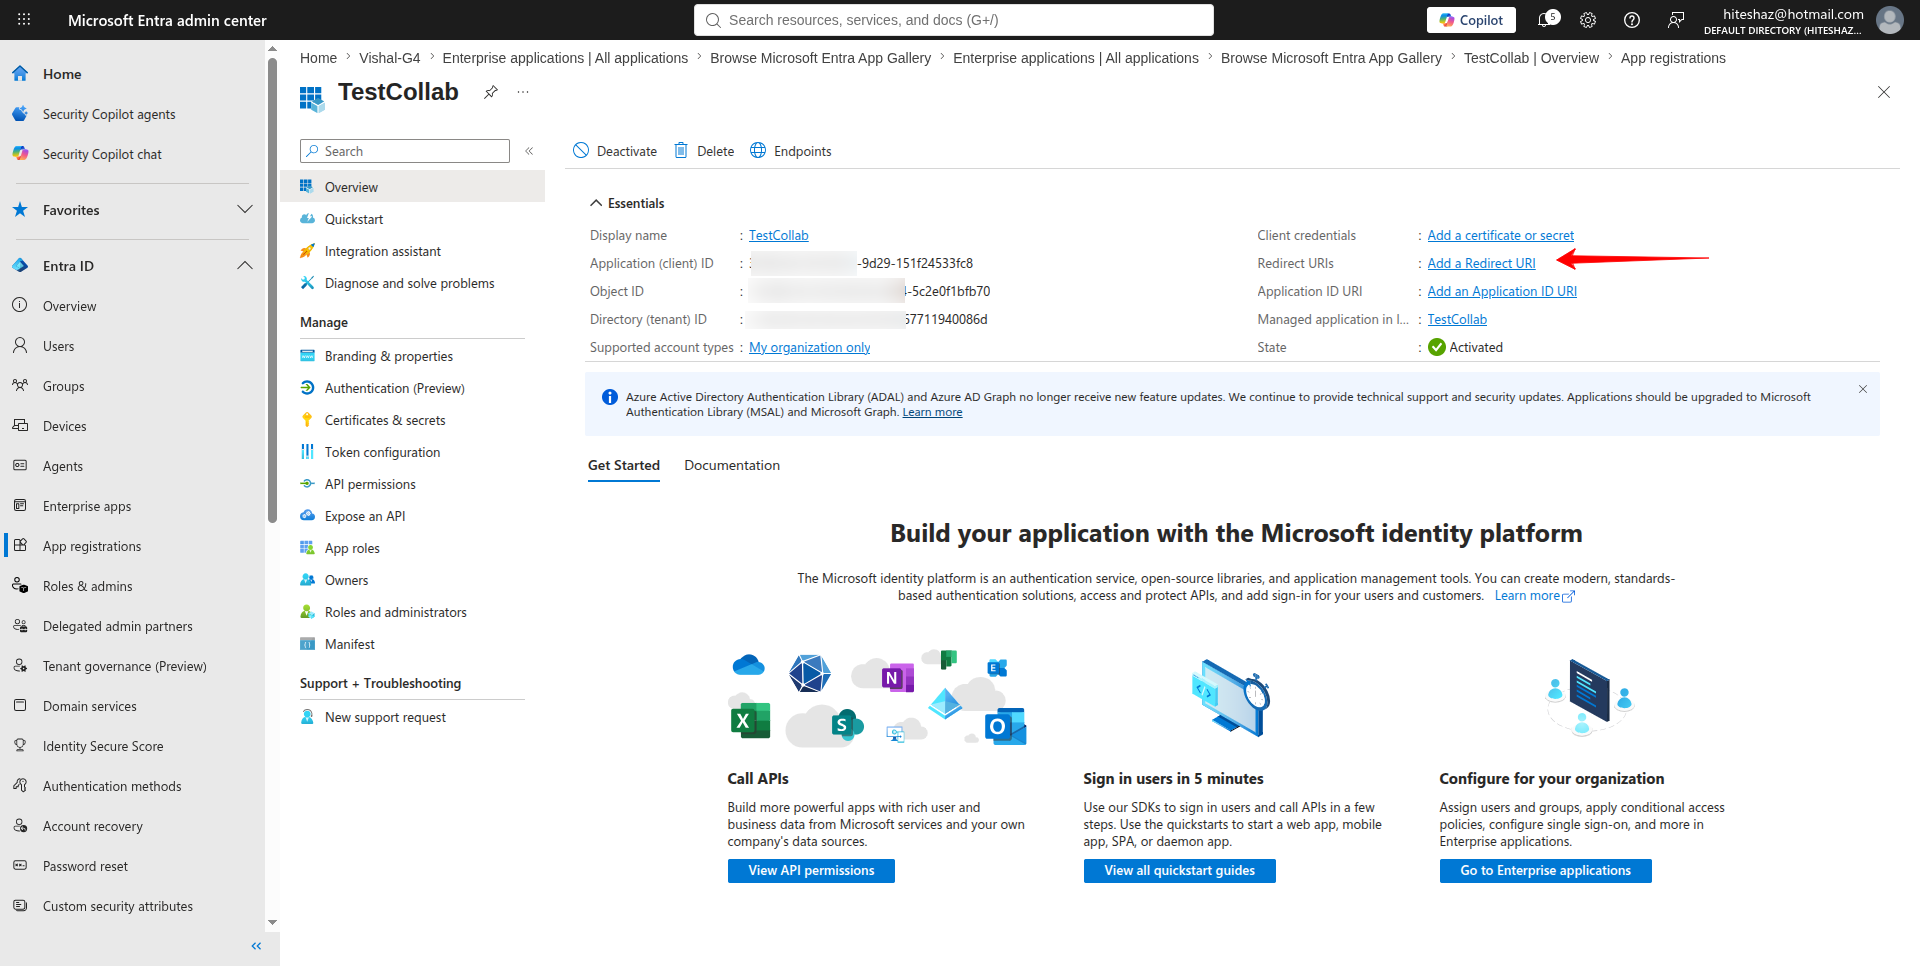
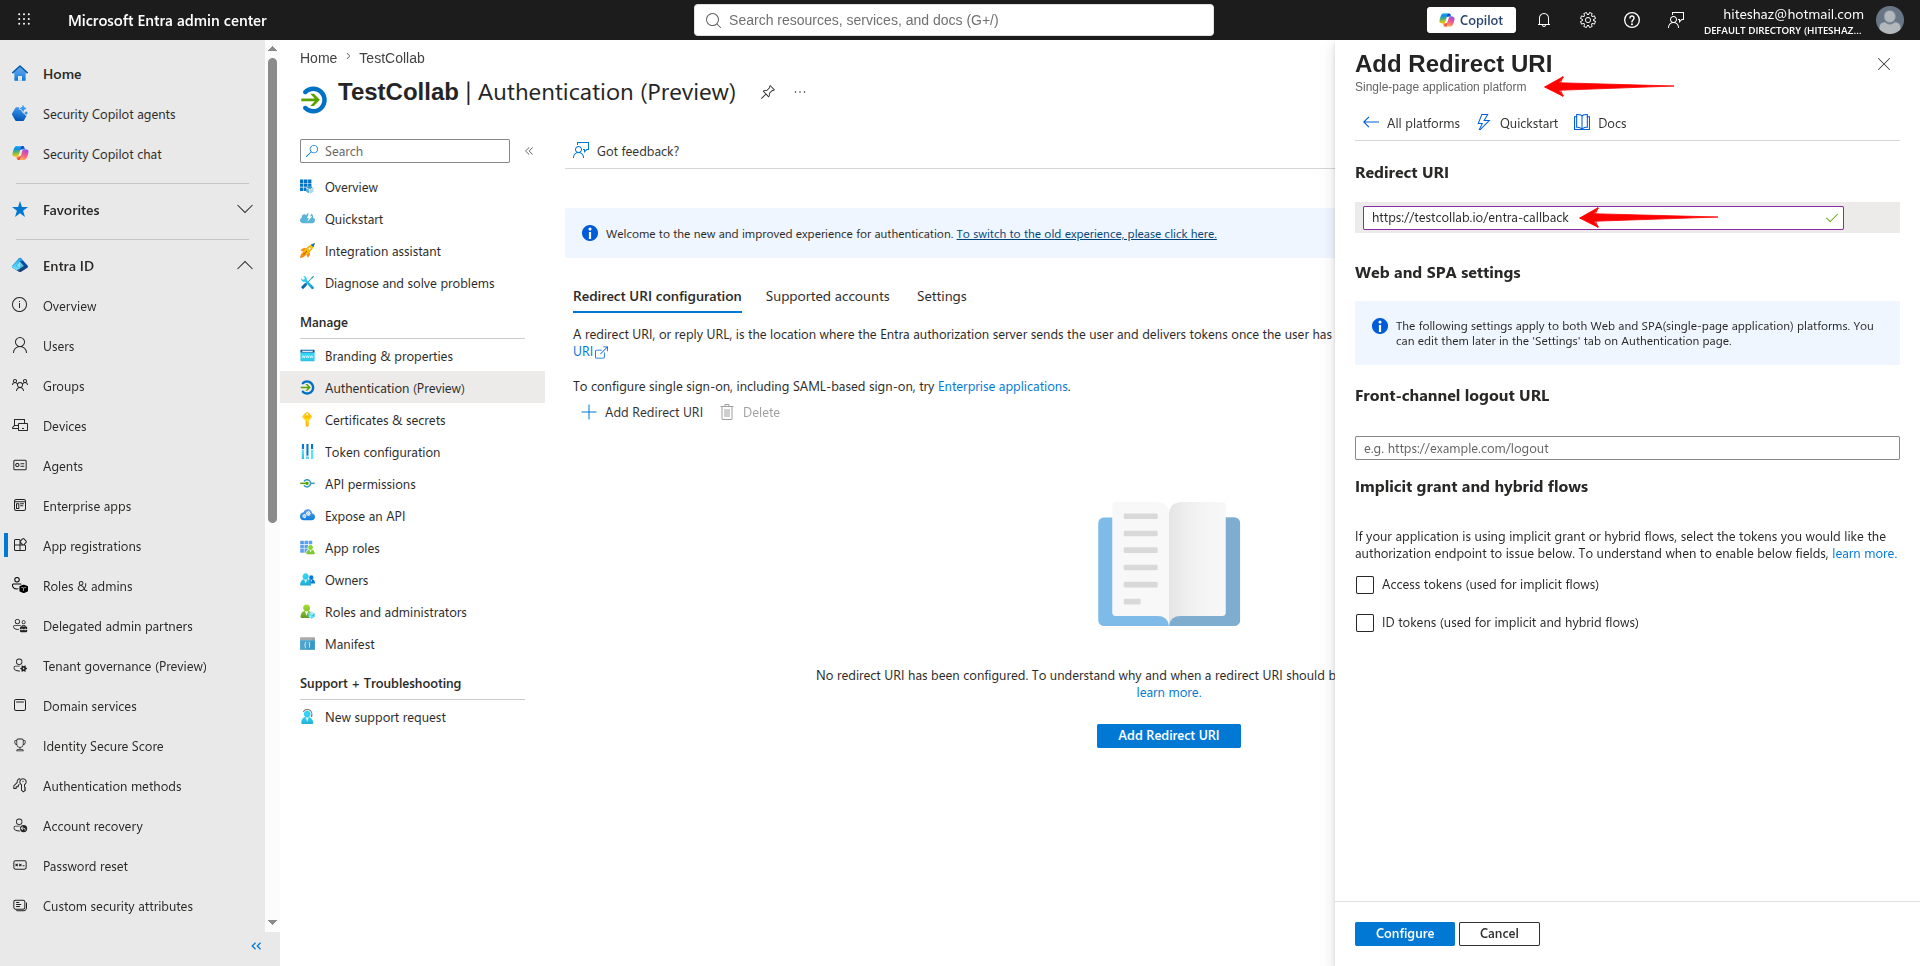
In Entra, go to App registrations → your app → Authentication, select Add a Redirect URI, choose Single-page application (SPA), and paste the URI you copied from TestCollab.
Choose Single-page application, not Web. TestCollab signs people in from the browser, so the address has to be registered under Single-page application. Registering it under Web will stop sign-in from working.
Use the value from your TestCollab setup page. The screenshots below are examples; do not copy their Redirect URI because the correct address can differ by deployment.
Step 3 - Copy the two identifiers
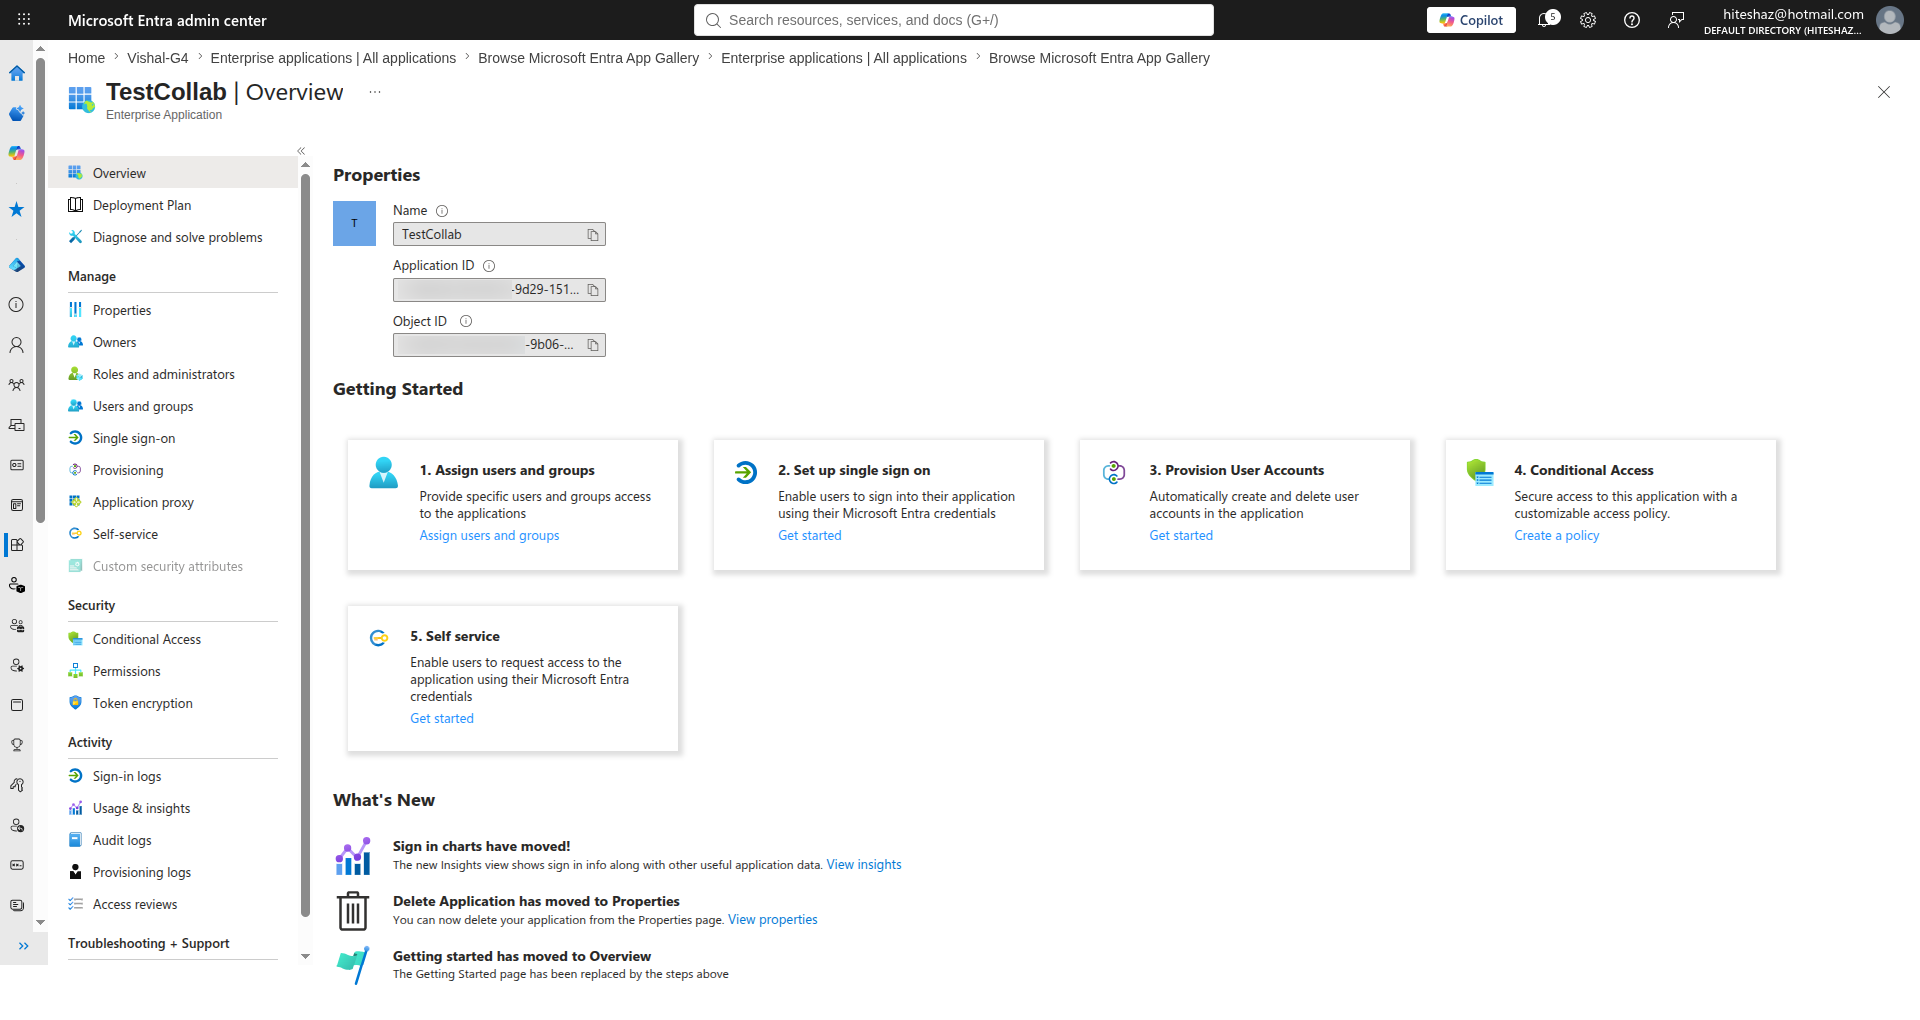
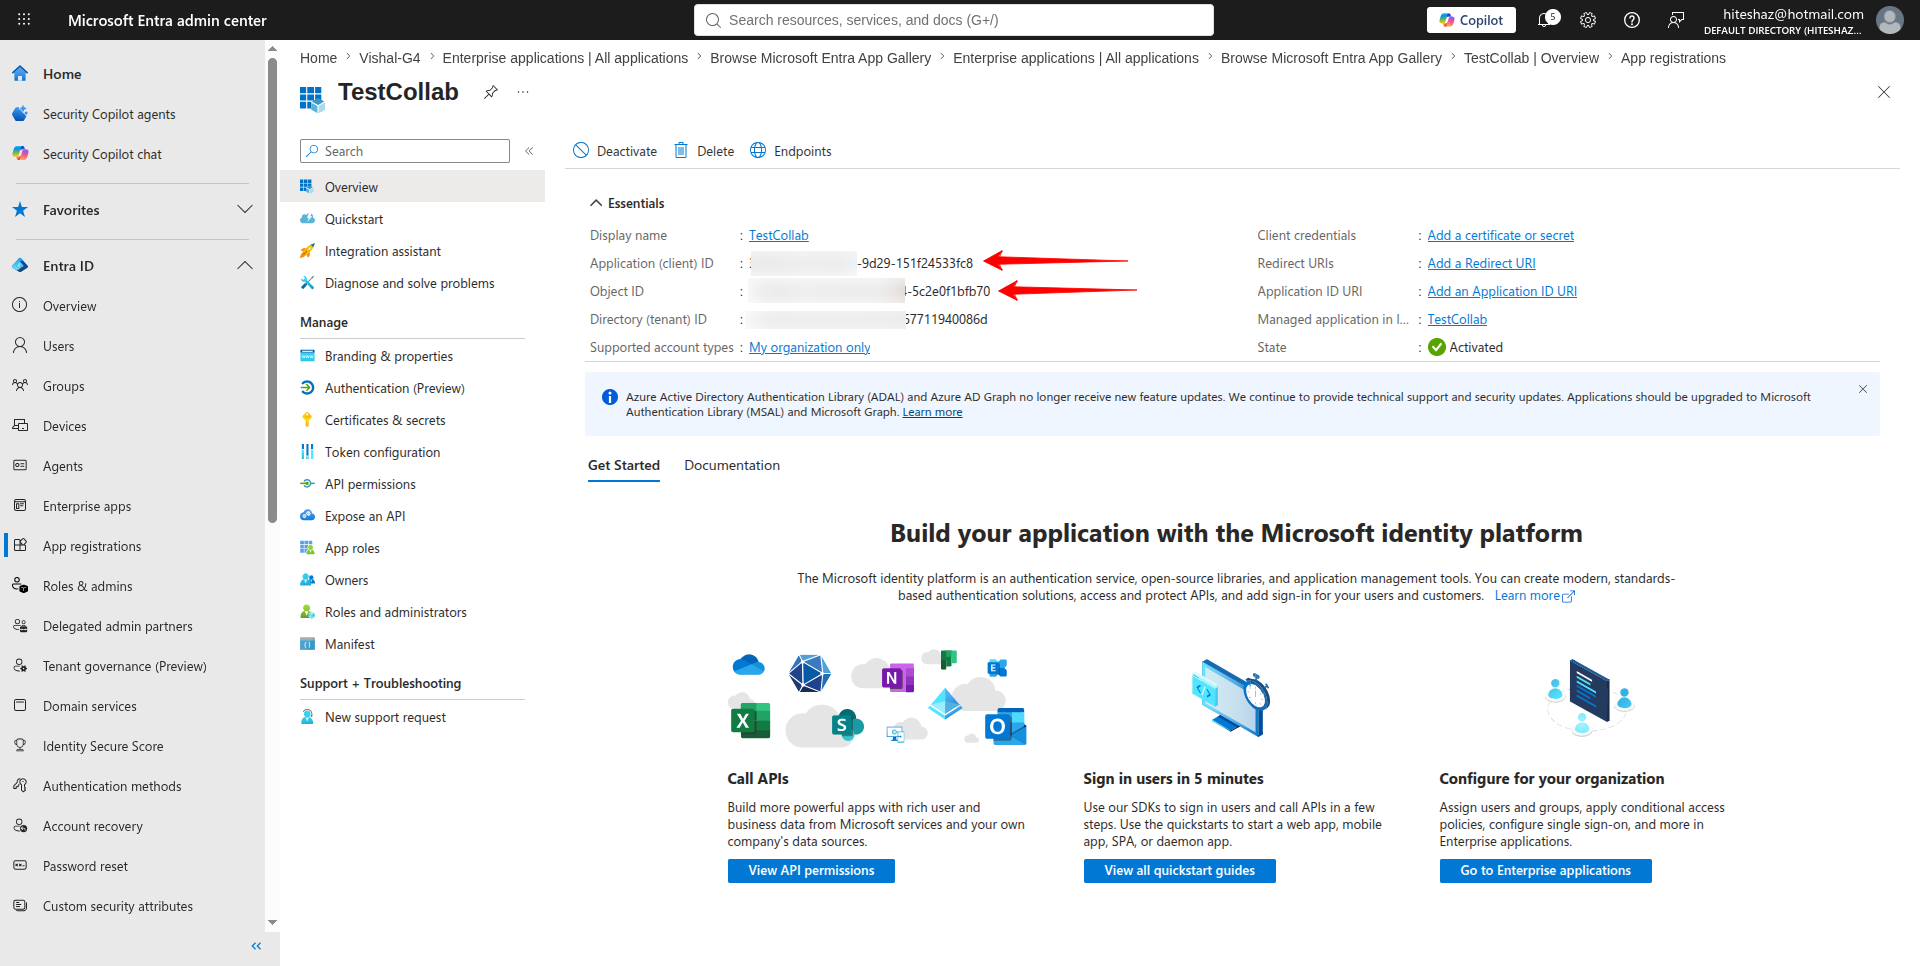
On the app's Overview page, copy the Application (client) ID and the Directory (tenant) ID. Both look like 11111111-2222-3333-4444-555555555555. Your TestCollab administrator needs both.
Step 4 - Add the permissions
Open the Microsoft Entra ID setup wizard in TestCollab and use the permission list displayed for your deployed version. In Entra, go to API permissions → Add a permission → Microsoft Graph and add exactly those application and delegated permissions.
Do not substitute broader permissions from an older screenshot or guide. Grant administrator consent only for the permissions shown in the current TestCollab wizard.
Step 5 - Create a client secret
Go to Certificates & secrets → Client secrets → New client secret.
Copy the Value and keep it safe - Azure shows it only once, and the Secret ID is a different thing that will not work in its place. Transfer the Value through your organisation's approved secret manager or one-time secret channel, not email, chat, or a ticket.
Step 6 - Decide who can use the application
Assign the users, groups, or app roles that should be allowed to sign in to TestCollab. Only people with an assignment your organisation has mapped will be able to get in.
Hand over to TestCollab
Pass these three values to your TestCollab administrator:
Value |
Where you found it |
|---|---|
|
Directory (tenant) ID |
Overview page |
|
Application (client) ID |
Overview page |
|
Client secret Value |
Certificates & secrets |
Next: Turn on Microsoft Entra ID single sign-on in TestCollab