

It's tough to manage everything all by yourself, so a team's work is critical in making the project a success.
Let us discuss how members can be added to a project and what options are there to manage them.
Adding a member
Before we get into the details of process it is worth noting that all users with administrator rank by default have access to all the projects on TestCollab account. So the steps mentioned below apply to the limited rights users you have.
Click on Settings in navigation menu
Then click on Team Members
On this page you will see all Project Members.
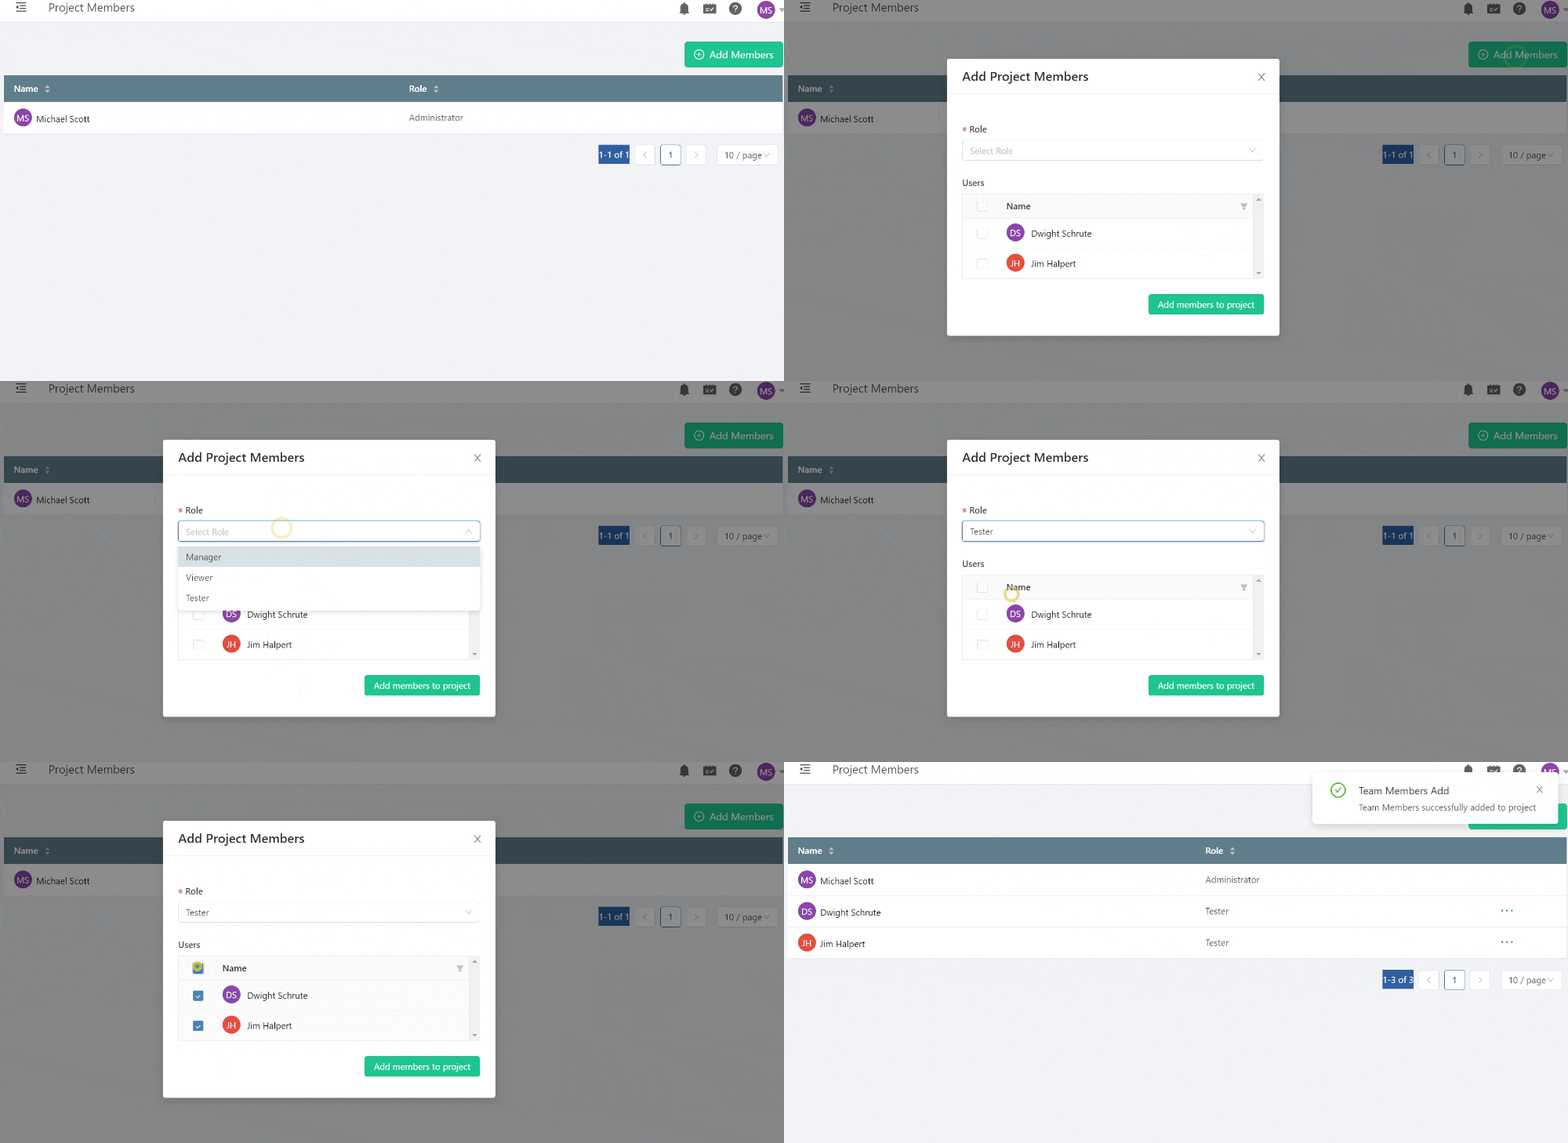
Click on Add Members button
You can select one or more users along with the role they would be assigned to in this project. A role decides what kind of permissions a user would have in a project.
Editing members Role in Project
Role can be changed if needed using this edit option.
Deleting members from Project
Members can be removed if they are no longer needed in the project, a member once removed will not have any access to the project.
If the member still holds work, TestCollab will not remove them silently. You get a summary of what they hold: test cases where they are the default assignee, test plan cases assigned to them, and any per-configuration assignments. You then choose one of two options:
-
Mark assignments as unassigned. The work stays in place with no owner.
-
Reassign to another project member. Pick the person who takes over. The list offers only members whose role lets them run test cases.
The member loses access to the project straight away. The work is moved in the background, and you get a notification with the counts when it finishes. Completed executions, results and history are never changed.